Wednesday 31 August 2016

Pine Cone Final


I used the excuse of working on quilts to give me a little more time to look at this and frankly get up the nerve to thread paint it.
I wasn't completely happy with how the wolf turned out and I hesitated with this for that reason.
But today I dived in and I can say I am happy with these results.

I'll probably frame finish this rather than envelope.

Monday 29 August 2016

Pine Cone - Day 5...Day 6 Actually

I finished painting this today. Slow going because I worked on it while I was quilting a couple of small quilts. When my legs got tired, I'd sit down and paint a little bit more.
I took off the original branch that was just glued in place. I rather like it in free fall. Maybe that's how I'll finish it.


My intention is to thread paint this now. But I do like it the way it is. I always wonder if I might ruin it when I start stitching.

Saturday 27 August 2016

Pine Cone - Day 4


Well its not really fair to imply I worked on this all day. I spent most of it working on the quilt I had mounted on my frame.
Then I had a nap.
Then I worked on this pine cone for about an hour while listening to a Louise Penny novel.

Thursday 25 August 2016

Pine Cone

In the end I went with coloured ink pencils.

More tomorrow!

Playing around with Black Walnut dyed Cloth

This is such a warm colour and I've fallen in love with it!

I whipped up one more in my series of "pounded" art.

I had spent a number of hours thinking about this beauty, a very ethereal photo/painting.


Layers seemed a natural but I don't appear to be there yet. Maybe I don't have the right materials.


But that's why it's important to play.
Yesterday I decide to try and make this guy.
This is a lovely painting and has so much detail. Photo-shopping this guy gave me....
and after projecting this to enlarge it, I made two tracings, this one


and the darker parts


Fusing these two together gave me a base to start with.


Now I'm trying to decide whether to use paint or crayon to darker the interior of this guy.


Wednesday 24 August 2016

Wolf Final


Among the things I did today to tidy up before starting some thing new...was to FINISH this guy. True there wasn't much left to do. The border was stitched in a wood grain pattern and it was bound with the same grey flannel (yes pants from the thrift store.)
Grey is softer than black!

Tuesday 23 August 2016

Finished Flimsy!


All in all, this went together very smoothly and quickly. It's a bright little thing!
It's about 50x60
Now I have to think of a good home for it.

Monday 22 August 2016

Quilt From the Northcott Prize

Yes I'm actually making a quilt!
I'm a bit brain dead so the mechanically nature of assembling a quilt is very relaxing and mind numbing! I put on a big U tube collection of Tragically Hip and started sewing.

There were 12 yards altogether. That's a lot of fabric. 7 were nice heavy solids and 5 were an assortment of geometric designs, all coordinated with the solids.
I found a nice little pattern delivered to my mailbox by Connecting Threads so I started working on this right away.

The pattern called for 20 different fabrics but I made due with 12 +1, my own background.


Using the solid colours to box, I cut the patterns for the centers. No colour box received the same patterned material more than twice.


This is about half assembled. The alternate rows will be staggered.


Saturday 20 August 2016

So I found myself some BLACK WALNUTS

I guess the squirrels missed them, but I didn't.
To play around with them I took some of my poorly dyed material and threw it into the "recipe" *
The results were so warm and complex I decided to re dye some of my earlier pieces.

The results from one of the earlier pounded pieces was so NICE.....


I took the rest of the rust stained pieces........


and threw them in too. **


The weather has been so beastly here I can only work in the basement... and that means small amounts.

* break apart and boil in water
** wear gloves!

Friday 19 August 2016

Wolf - Day 7

I spent some time this afternoon on this guy.
All that was really left to do was to finalized the dark feathered fur along the edges.
This would fully attach it to the backing at the same time. In retrospect I should have finished all but the very edge as I broke two needles finishing the black.

As a precaution I didn't do all the stitching I had intended but gave it a once over with, first a black pastel crayon and then a white, just to brighten a few spots.


Finishing the matting will take a few hours, but not today.

Northcott Bundle

I attended the awards ceremony for the IPM last night. Even though my Woodlot piece did not garner a prize I did come home with this hefty bundle of Northcott Fabric for my quilt block to the theme of 30 shades of Green!. This is their raffle quilt. The only picture I had was one from the poster.


 Not sure how I will use these as they are a long way from my usual choices!!


Here are the pictures of the top 3, mine is on the left.


This represented a map of Wellington county showing the towns and roads, rivers and fields.
The fabric was hand painted and embellished with embroidery.

Onward and Upward!


Thursday 18 August 2016

Wolf - Day 6

Before I stitch the remaining colour, Black, I decided to mount the piece.
Had I thought the whole thing thru a little more I would have realized if I added a bit extra on the "cut " side, the straight side, I would have had material to wrap. I had originally though about a simple
pillow case finish. I resolved that issue by adding a dark grey binding.

Nice but not great.
So I pinned the wolf onto the remaining, un-stitched blue.

Better but not right yet.
I wanted something that put it back into the wild. I tried an number of woodsy pieces but the green colour clashed too much.
Great to have a varied stash because I found the right one.


The colours work with the wolf.
Now the decision is do I leave it with this "hole in the wall" look, or cut and mitre the background to look more like a window?


Wednesday 17 August 2016

Wolf - Day 5

Almost there!
Ready to be stitched to the background. That is when the final pass in black will be made.


This gives you some idea of the amount of stitching already applied!

Tuesday 16 August 2016

Wolf - Day 4

I didn't get much time to work on this guy today.
I spent a couple of hours this morning traveling north to the depot for the quilts that are entered into the IPM. I saw no point in mailing my entry.
Judging is Thursday. Who knows what will happen?
I also received an email request to give a presentation of my work and methods, so I spent some time seeing how far back my computer records of my work goes. I switched from a website to a blog about 4 yrs ago. And when hubby transferred files to a new computer I know some things didn't make it.
I haven't accepted yet. I need to be clearer in my head about what I have to offer in a presentation.

But the wolf did move forward.
There isn't much more I can do with the ear until it goes on the backing.
The task is to remember that the order of the colour does play a role. Several passes is better than one heavy deposit of thread. Those long guard hairs go on last. They are the defining colour.
I moved into the "fluff" behind and in front of the ear.
I started on the head..........then I ran out of bobbin thread. Always a sign to quit for the day.


Monday 15 August 2016

Quilt From a Fun Weekend

I just finished quilting this little comfort quilt. Sadly it's destined for the sexual assault unit for children in our local hospital. I will pass it on to another member who will finish binding it and then it will be delivered to the hospital.


The quilting is very simple for a child's quilt.


Wolf - Day 3 - Starting with small

Before I did anything with this I decided to add one more piece of fabric to lighten the nose area. It was too dark in the original assembly.
Next I covered it with netting and stitched over the whole piece with mono filament, just to anchor all the pieces.
Why? Since I plan to use a hoop I didn't want the distortion from the hoop to shift pieces that haven't been stitched yet.
Of the three possible hoops, I chose the largest to fully encompass my starting location, the ear.
This spot needs to be filled. It has an inside that is a very different colour and texture than the edges.
All these colours are in the ear. The plan is to work outwards starting with the darkest.
The first few passes anchor and stabilize.
Working with in that area there is minimal distortion, just up at the tip where the path of the thread curls.
There is a lot of feathering to be added but I'm not planning on doing that to this spot until its on the background.'


Sunday 14 August 2016

Wolf - Day 2 - Finished cartoon

I was little slow off the mark this morning. We had rain last night, almost an inch and the heat has broken. I had to spend some overdue time in the garden weeding including the front driveway.
Then hubby decided he wanted a BIG breakfast today. ( It was the only meal he planned as there are two soccer games being televised.)

But I finally got to this guy.
He didn't need much and now that all the major colour shifts are in place he's ready to go.


As I intend to mount this on a prepared background, a remnant of my "sky", I need to think about where to begin and whether to start with the whole thing hooped.

In the mean time, I have a quilt on the frame that needs a long arm finish!

PS. I just had a call from my sister in BC to tell me she sold the last of the batch of quilts I sent out to her. This one is on it's way to Germany, as a wedding gift.


(I think I'm over my creative funk!)

Saturday 13 August 2016

Wolf

A few months ago I came across this piece of art on Pinterest by S. Cummings.


It was just screaming to be interpreted as a thread painting. But yes I am VERY aware of copyright issues so I knew I couldn't copy this outright. So I went hunting with goggle images and found this boy!

Now I'm willing to bet that this was the original photo, but as it was floating out there unclaimed I copied this photo and did this...........


projected it on a wall.
I sized it and traced it out.


In fact I traced it 3 times, once on paper and twice on an interfacing.


I turned to my bin of left over greys from our guild challenge of last spring. I rejected most and got it down to a few.

Then I started cutting.

Now if you buy a kit it either comes with fabric already fused to a commercial product or instructions to attach a fusible web. All you need to do is cut according to the supplied pattern and iron in place.
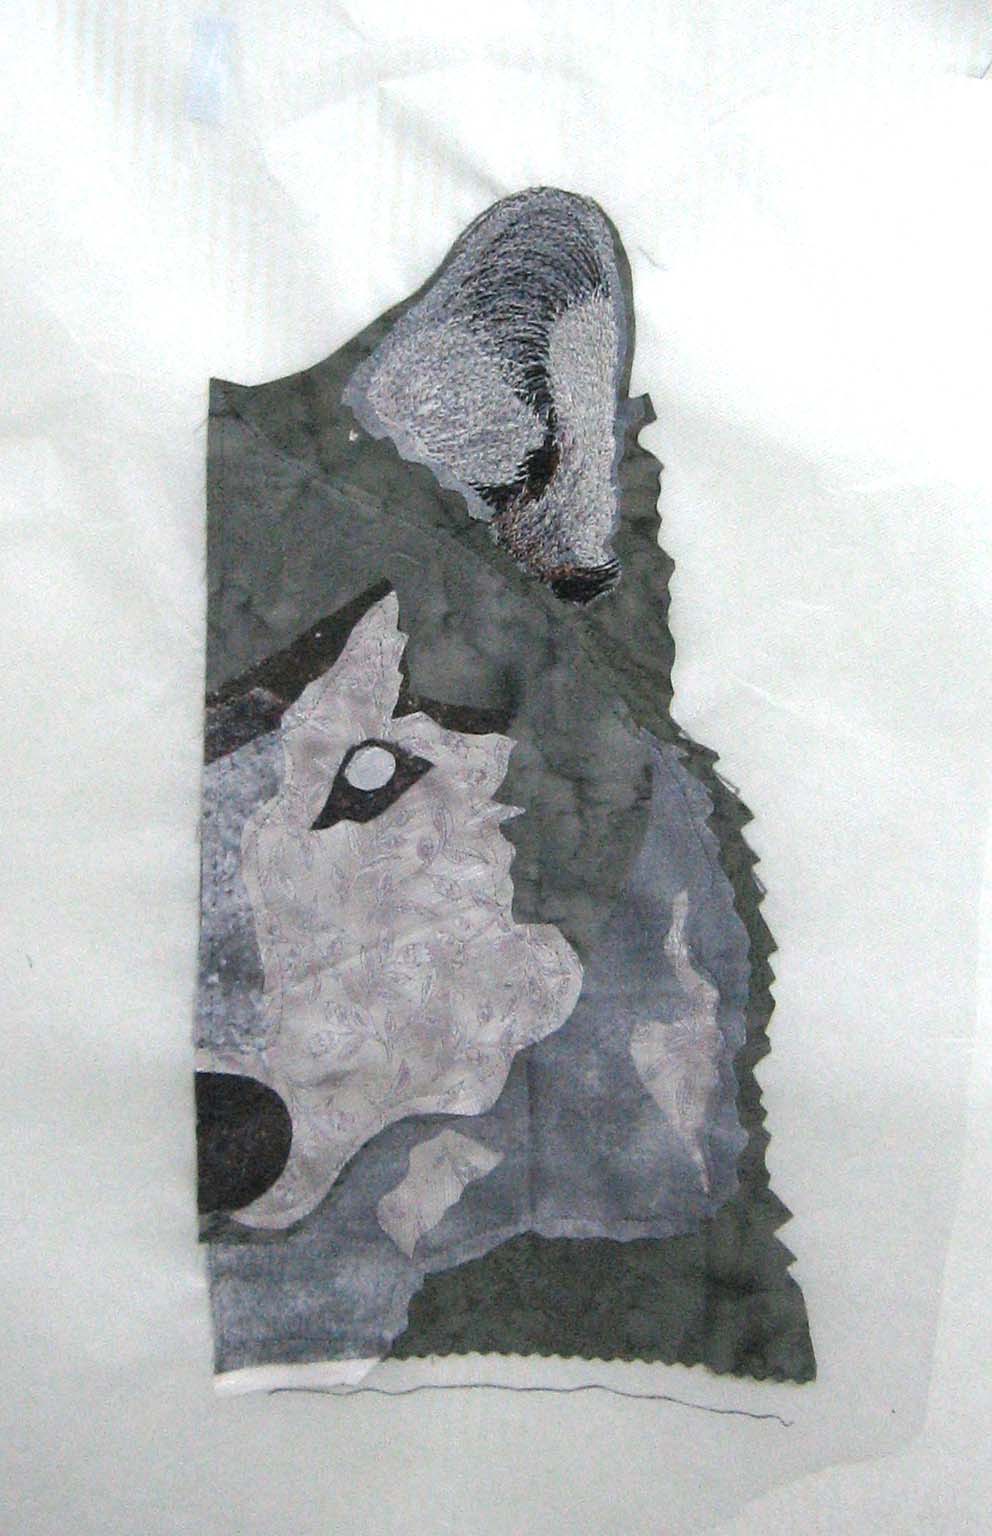
Well there is no pattern but this picture and no fusible web. I cut part of the pattern and traced it on the back of the fabric.


This piece of paper is tapped back together after each cut until I have all the pieces I think need to be exactly ( or close to ) the same as my tracing.


I "glue" with a few dabs of school glue stick. to the second tracing.


After a few sections are roughly cut and glued in place, it becomes difficult to place smaller pieces. That's where the third tracing comes in, as an overlay.


I did 4 large pieces today; 2 grey, 1 brown and a pale beige.  That's where I'll stop.
More tomorrow.