Thursday 30 November 2017

Found my Distraction ( that was quick!!!!....)

# 2 Son just asked if I would make this for his Christmas present.
How can I say no!

Radiant Splendor Star - Day 3

This will probably be the last I post about this quilt until it's complete.
All the decisions are made and the rest is just repetition of what I did today for 3 hrs.

Unless I get distracted by something else....( that never happens ) it should take, at the most ..5 more days.
(Getting old...I can only stand on my feet for so many hours.... Sigh)


Wednesday 29 November 2017

Radiant Splendor Star - Day 2

Well there is nothing like just diving in. After all the hand stitching was done there was no value in hesitating as I lose focus and all those ideas buzzing in my head, if I walk away for a few days.

I had toyed with the idea of starting in the centre and working out, but to me that's just inviting pinches and wrinkles.
The sketch I made for the borders echoed the wheat theme. Ten of them fit nicely along the top edge.


After a simple arch in the black, I moved onto the first of the diamonds.

I didn't want the whole piece to be about wheat but a foliage/feather was the next choice.


Drawing designs and stitching them are two different things. White paper gives a very different impression than the same design on the fabric.

Drawing all these designs life size allows me to reference what I did before. There have been times when I've reached the far side and couldn't remember how I had finished a corner or how many repeats there were in a section.
Some people use photographs but my camera is not that versatile in giving me a clear idea of what went where. (Hubby says it's just me!)


The drawing for the large negative space just isn't right yet. Maybe stretched and a bit more grass like.
Tomorrow.

Tuesday 28 November 2017

Working with Negative Space in a Quilt

A friend brought me quilt top the other day. The pattern is Radiant Splendor Star.
It's a variation of a single block enlarged to a quilt size. This results in there being a lot of open space.

Before deciding how to work this we had a discussion about who the quilt is going to (with the fabric choices in mind) and how she expected it to be used.

The only real pattern is in the main block and the outer border. It appears to be a grass/wheat sheaf.
That seemed like a natural motif to work with.


Today, after drafting the centre pattern with my ancient EQ6, (modelling Customer quilts seems to be about all I use it for anymore), I played around with some of the ideas we had discussed.

I chose the design/layout in the upper left.


Now that's a very large open space, well over the throat of my long arm. I can, but hesitate to markup a customer quilt, even with their permission, particularly now with the nightmare I had with my Collage background. I decided to sketch in the main ribs of the wheat and some cross hatch references using thread. Easily removed when no longer necessary. That's what I accomplished today.


 Quilting this will take some time.....

Monday 27 November 2017

Sample 3 - Confetti Art - Final


I didn't sit down to work on this till around 1 PM today.
At 3 it was finished and bound. Very Do-able in a short time.


Let's see now. What's for Sample 5?

Sunday 26 November 2017

Sample 3 - Confetti Art

Confetti is deceptively simple. It goes together in a flash but then it needs almost 5x as much time stitching it down.

I've tried several approaches. When I started, I sprayed my base fabric with Krylon. The fact that I still overlaid it with netting made that redundant and a little sticky. Now I use nothing but netting.

I've made pieces in layers, stitching the background separately. This works very well if the foreground is not more confetti.

But this piece, I've adapted from a copyrighted piece done in tiles, using in my version, only 3+ colours of fabric. I recommend batiks as they have no right side. Nothing is more frustrating (but sometimes necessary) than picking out pieces that fell 'butter side down' and turning them over.

Using a base fabric that is almost the same colour as the foreground hides a lot.
This piece is over sized and the intent is to cut it down. That way there are no empty spots at the sides.

First the 'ground'.
Some of the under-story and tree trunks. ( Batik resists fraying so its great for 'skinny'.)


The main fabric colour and darker accents.


This is finished. That took maybe 1 and 1/5 hrs. and less than a FQ of the fabrics combined.
all that's left to do it pin.

HA!
HA! 
Now THAT'S pinning. Nothing can move.........very far.

Saturday 25 November 2017

Sample 2 - final

A few hours of stitching finished this nicely.


I decided to stitch the background with the trees off so I could place them on top of the netting.
It made the green much brighter.


I used 3 colours of green to provide a bit of variation.
The deciduous trees trunks were an after thought. Variegated thread on the darker trunks and white stitching only on those intended to be birch...or poplar.


So it is possible to do this in a little over a day. Easily finished and lots of scope for personal touch..

Friday 24 November 2017

Landscape Sample 2 - Winter

This sample is more like tiles or mosaic.
It works up fast even if it does use a surprising amount of fabric.


For ease and speed, none of the 'tiles' were cut much less than one inch, with a distinct difference between the fabric used for the sky and those used for the snow. The trees I cut from a luscious Batik.


This went together in less than four hours. All the pieces were 'anchored' with a glue stick. Ironing with a hot iron dries it instantly, but pieces can still be moved. With a final netting over lay it just needs some stitching.

Tuesday 21 November 2017

Collage Fish - Final


I brought this down to 20 inches square. It was originally 28x 40. That's a lot of waste.
But it brought importance back to the fish.

I wanted a very light finish, but it needed a definite edge.
This is raw edge with an overcast line of three strands of wool.

Time to Finish the FISH

The Seaweed used up all my green embroidery thread.
The purple marking lines are diminished.
What's the hold up now?
Mounting this trophy!

After working yesterday with the shiny white embroidery thread on the edges of the dull birch cloth, I got thinking that maybe this little fellow needed a shiny boost as well. But how much?


After discussing my dilemma with the resident photographer and critic, the answer was simple.
The background was too big.
So the solution?

chop chop chop chop chop!
That first cut was the hardest.


Monday 20 November 2017

Landscape Sample - Final

It was tough settling to work on this piece. My mind wasn't focused. I took lots of breaks and that seemed to help.
After I finished stitching the background I rinsed off the stabilizer, and let it dry overnight.


It came up a bit stiff and there was some of shrinkage, but most of that will be concealed.

Without the netting the thread colours came up bright.


A few auditions and I started attaching the birch trunks.


Problems necessitate flexibility and this time was no different. There were two issues that arose. I intended to stitch the boles in a loose satin stitch and then stitch over that with a bright, shiny embroidery thread white. Whether it was the residual stabilizer, now in the fabric or the number of layers of fabric itself, the embroidery thread shredded quickly.

I abandoned the satin stitch anchor and just went with the looser irregular zigzag with the shiny embroidery thread to both attached the birch trees and highlight the white. This worked just fine.
The issues with the cloth itself simply meant I had to stitch much slower.

I know there is a scientific or maybe psychological explanation but an odd number of trees always 'feels' more satisfying.


I'm leaving this piece uncropped and unfinished on purpose. Part of this workshop is why I over build my pieces (dimensions) and how to decide how much to crop.

This piece has a decidedly different look when square


and when rectangular.


Saturday 18 November 2017

New Piece - Sample

I feel like I've done confetti art to death. It was well received by the CQA judges and I'm ready to move on. I'll do more, but just not right now.
After my little venture into the collage world, (fish), I'm not quite ready to jump into a major piece.

I'm giving a show and talk next month at the Dufferin Piecemakers guild in Orangeville and a workshop in the New Year. As the ladies haven't chosen a workshop theme yet I thought I would work up some fresh pieces that would be quick to finish and still have a lot of impact. The Confetti is a choice, but I'd prefer not to go there for a one day workshop.

I photographed this piece of original art a few years ago at a local show. The colour is chunky and I thought collage might be the way to go. Just a few colours but with a major impact.


The Blue and Greens were what caught my eye. ( And the birch of course )


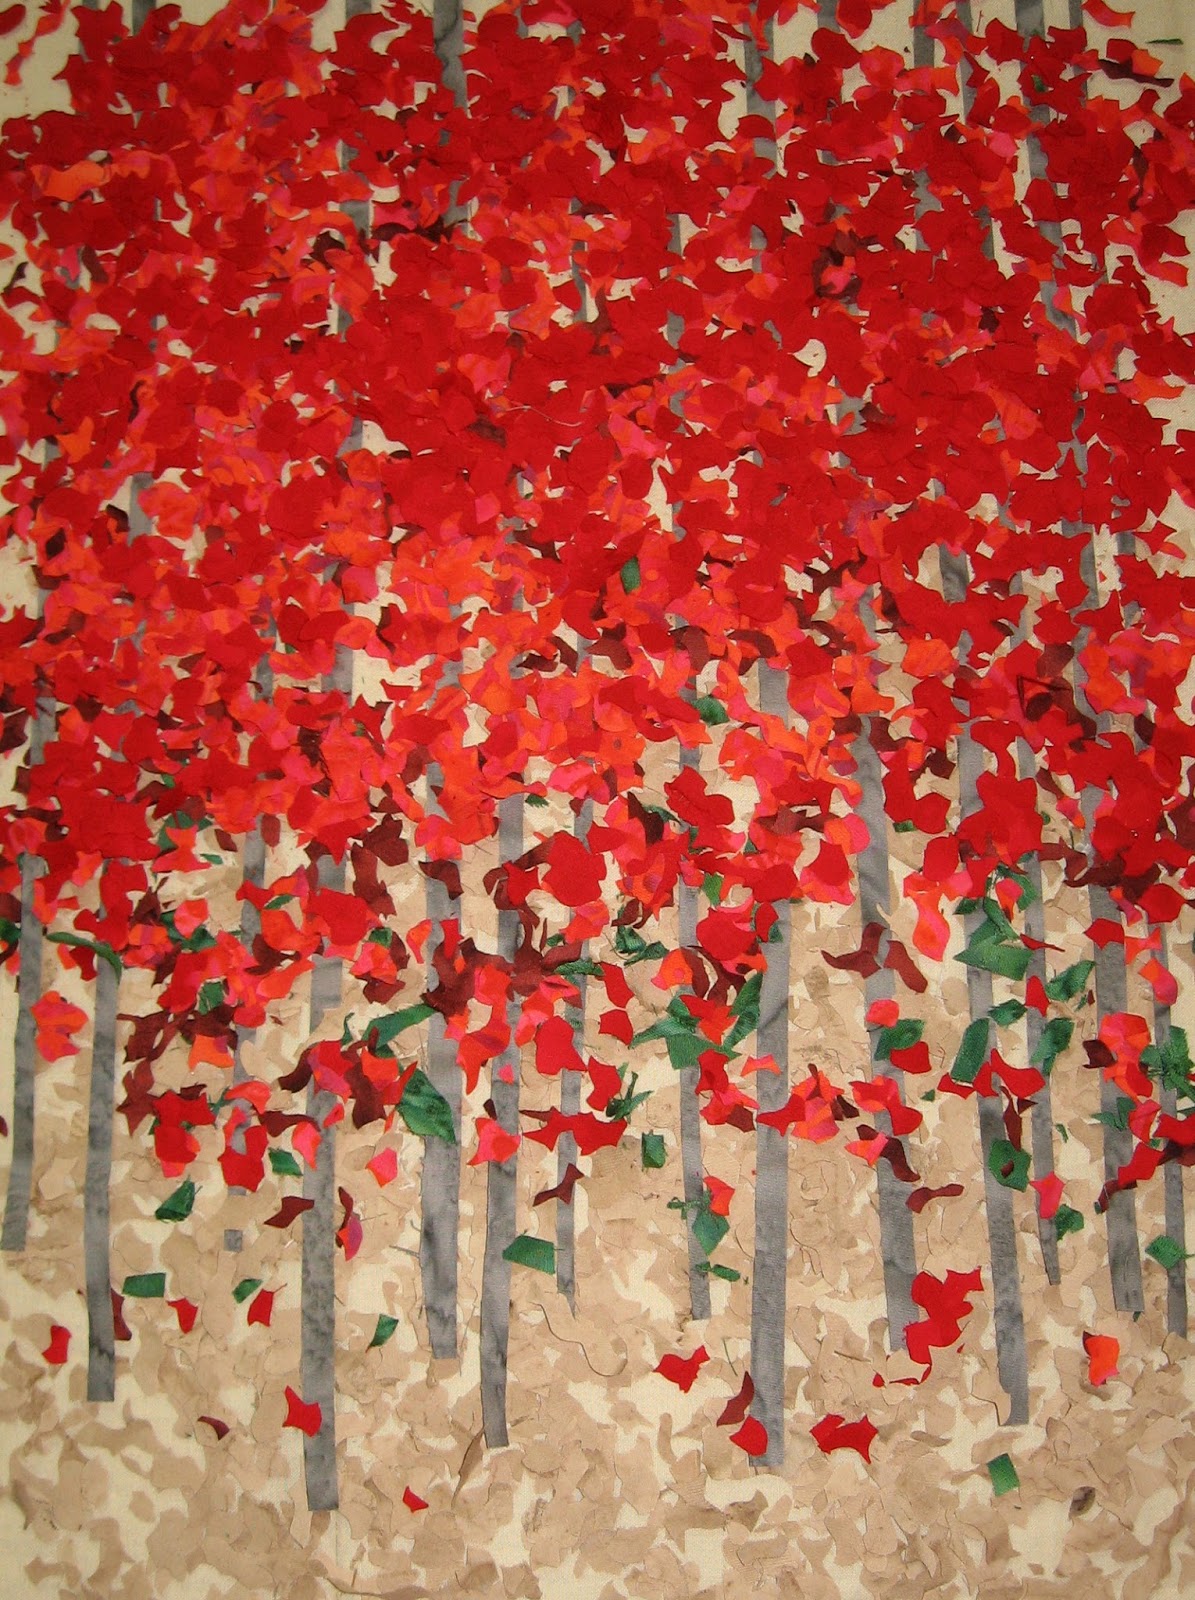
 Confetti method but the pieces are much larger. I started with two colours of chiffon and then moved to solids.


After a false start I went back and added the dark foreground, and then started over with the foliage.


I muddied my 'birch' fabric and added some blue paint to tie things together.
After first covering it all with netting, I changed my mind, removed the trees and used the soluble stabilizer. I wanted a cleaner look without the net. As these pieces are much larger, it isn't necessary to stitch the whole thing.


In some ways it is easier to work with. As long as your fabrics are wet-able there is no issue with removing the stabilizer at the end.


The stitching is lighter and more open. This works up faster.

Collage Fish - Happy News

I ALMOST threw the collage/water background into the garbage the other day. I was getting very frustrated with my inability to remove the purple markings. I had a little chat with a fellow in my guild who has become quite adept with dyeing fabric. He too, was surprised I had difficulty removing the marks which for him, like me, had always disappeared.


I came home and tried steaming the marks. It was worse. I folded the piece and put it on a shelf.

In the middle of the night I got to thinking about how this piece of fabric was so different from anything else I had used, dyed, crayoned or painted. The answer was milk protein.

I had this fabric with me when I attended a natural dyes workshop with Maggie Vanderweit. It ws necessary to soak the cotton fabric in a milk solution to add the animal prtoein needed to get a good dye result from leaves and flowers.

The next morning I put a small amount of hot water in my washer, added detergent and oxyclean and let it soak.  I had nothing to loose, as the piece in this shape was unusable. After a soak and then a short but thorough rinse cycle I took it out of the machine.

It worked.
The piece came clean.  The batting held up well too.

A Win Win day.
So I'm back to where I might just finish this.

Wednesday 15 November 2017

Bread and Butter Quilting

This love affair with fabric doesn't come cheap so I'm very happy when custom quilting crosses my path.

I worked with 3 very different pieces this last week and I know the owners will be as pleased as I am with the end results. The largest one, a queen sized flannel took the longest. I could only work at it for a few hours each day. Every circle motif required thorough pinning as the material was so fluid. So it was very slow work. But it was completed with no folds or pinches, top or bottom.


The second, smaller piece was total ruler work. It too was slow but without the constant threat of materials shifting. This was a lovely piece to work on, a combination of 'shot cotton' and Kaffe fabrics.


The last quilt was very different again. With so much white and small accents of colour it appeared very delicate. This I gave a bright pink rayon thread treatment and used light fluid motifs of curls and loops.


All different and each requiring a different approach.

Tuesday 14 November 2017

Collage Fish

Still not finished.
I have made progress.
I eliminated the second style of seaweed and concentrated on making the remaining strands realistic. This involved cutting one inch pieces of 6 strand embroidery floss (because that's what I had) and threading it through the yarn, gluing it in place and them 'fluffing' the strands apart.
I'm not finished, but its heading where I want it to go.


HOWEVER another issue has appeared.
I have used the "SEWLINE" brand air erasable pens for several years now. As promised the purple line disappeared, sometimes within minutes and sometimes a day.
This time is hanging around too long.
I drew a straight line on the water fabric to orient the bubbles. I used a stencil to get the bubbles perfect and varied. But the pen marks haven't gone yet. It's been over a week and I'm still holding on to my faith in the pen.


Until that time the marks disappear I won't attach the fish to the background. I may be spending time on something I will throw away but until I make that decision, I keep making seaweed.