Sunday 29 April 2018

Albert Cote Workshop

My UFO list has grown again thanks to some landscape work and two workshops from the last two days. A local talented Fibre Artist and quilter, Albert Cote gave a "rug" class at our guild in Guelph.

While this is not a new technique it was much larger than I had attempted before. A few technique tweaks made the process a little easier and improved the design process.
I caught photos of almost all the samples. There is a lot to do to "finish", but as usual I was impressed by the variety of fabric and design choices.

There were a few like myself who were not ready to commit 5 large chunks (20"x36") of REALLY NICE fabric to an unknown project, but after seeing the results and the potential in this exercise, my next one will be more exciting.

The first three photos are process. After stacking smoothing and stitching all around the "rug" to anchor the 5 pieces, a design was drawn and then stitched. The remainder of the day was cutting into the layers to reveal the different colours.


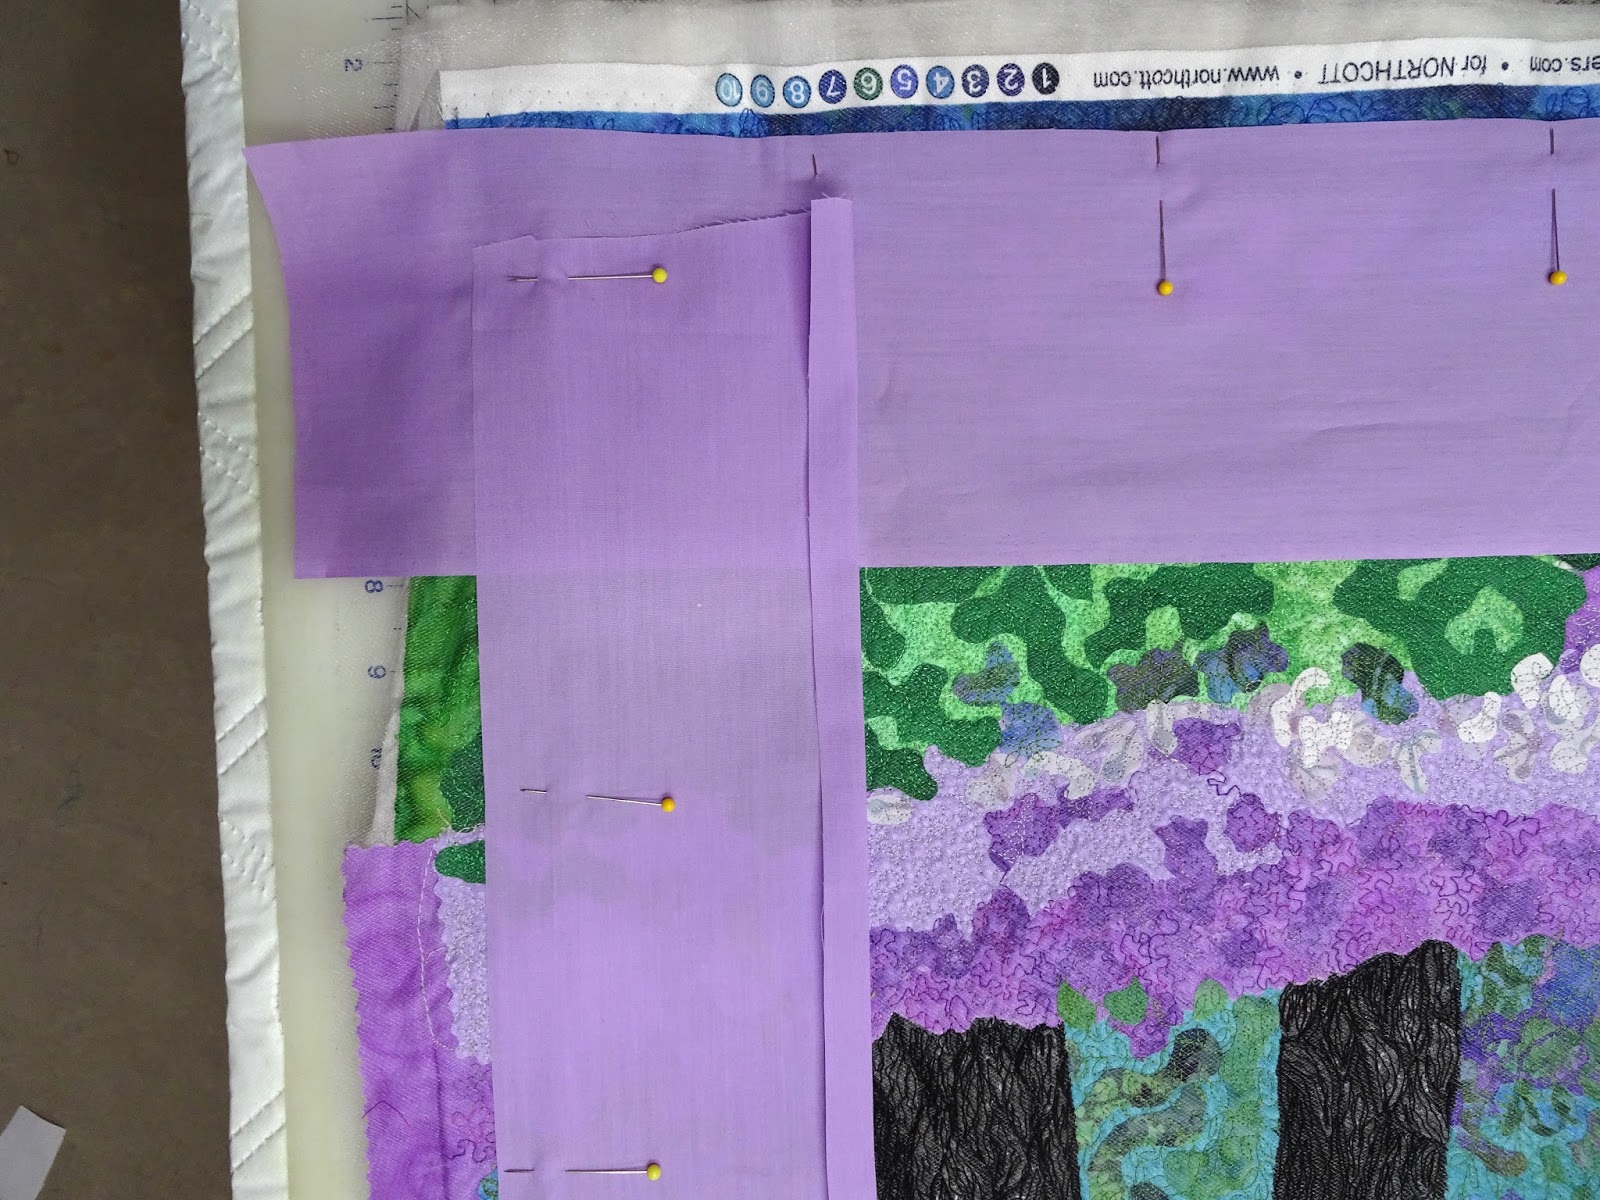
This one, mine, shows a hint of my default topic, Botanics. But I did finish the cutting. There is still a lot to be done, the quilting and washing to fray it and then any embellishing I decide to add.


Enjoy the rest. A lot of very talented and colorful work here.


Until I finish this one.....................

Friday 27 April 2018

Purse Workshop

Ten of us met at the quilt shop today and had a really fun and productive time.
Three made the same model but most brought their favourite pattern and we cut and stitched and gabbed from 10 till 3.

No one finished but the deadline is this Wednesday coming, when we meet again on our regular schedule. I'm thinking at least half will have them complete.
Some got only as far as 'dressing' the materials today, but all are unique and a definite reflection of the sewer.
Enjoy!
( Oh yeah, we also booked the facility for our fall project in October.)


Wednesday 25 April 2018

The 3 Sisters

On the drive from Calgary to Banff and beyond, my sister always pointed out this mountain formation. The 3 Sisters, or Mt Trinity.


I have a few days before I do two events, and since the rain has forced me back inside, I thought this was a small project to start.
Assembling the pieces was quick. It only took the morning.
So my intention is assemble a few more and then I'll stitch  them all over the next few days.

Here's how they went together.


 LOTS pf sky


A bit of white for more snow


Fussy cut the tailings and the edge of the forest.


 Cropping it restores the piece to a pleasing size and shape. This is about 11x14.


Here are two more, same scene, same method but each a little different.


Friday 20 April 2018

New Spring Purse

Next week my Fibre Arts friends are meeting in the workroom of a local quilt shop. This is something we do twice a year. There, we try to work on a common themed project or if requested a member gives a mini workshop on a skill or art piece we would all like to try.

Its been a long winter and I think we're all still a little sleepy. We couldn't think of anything more exciting than making a new purse for spring. Some of us have a favourite pattern that will be reused and some, like myself, decided to use a pattern from Yoko Saito's book Japanese Quilting.


I'm redoing the purse from the front cover. I made one version using upholstery fabric last year and I used it a lot. I'm seduced by the taupe colours found in this book so I decided I'd do some fabric weaving, to see if I could approach the feel of her work shown in her illustrations.


These were the cottons I chose. I cut one inch strips with the grain, and put them through a bias tape make to give them all a finished folded edge.


After pinning the purse pattern to a piece of foam core I started weaving the pieces together. I was aiming for a herringbone pattern but toward the end I know I got lost. LOL


To get the lighter centre, I cut and glue tacked in some different colours. After giving the glue about an hour to setup, I fused freezer paper to the front surface to move it off the foam core.


After removing the pattern, I ironed on a light fusible web to the back and then removed the freezer paper from the front.


Now this is ready to fuse to a purse weight stabilizer. Then I'll stitch all the lines in place before I start assembling the purse next week.

Thursday 19 April 2018

Quilts for Humboldt Saskatchewan

Hardly anyone in Canada is not aware of the tragedy on April 6 when a bus carrying the Humboldt Broncos Hockey team was struck and demolished by a transport trailer. 16 members were killed and many more were and still are hospitalized. The call went out from the local CQA members for quilts and quilt blocks in the Broncos colours.

A lovely lady, whom I count as a good friend, assembled two which I gladly quilted for her. After the bindings are attached they will be sent out west to hopefully aid in comforting those involved.


SAQA Exhibition in Texas

As controversial as this may be, it is a very important exhibition.

http://www.saqa.com/memberArt.php?ID=3617

Paste it in your browser.
 

Monday 16 April 2018

Alternate Binding Methods

It was time to bind the edge of my Forest Violet piece.
When the design and/or the quilting go right out to the edge and beyond I have the option of 3 bindings.
1 - French fold, commonly used on quilts.
2 - Envelope binding, can be used anywhere
3 - Wrapped Binding
And I just found this one on line.
It takes the facing PAST the edge so there is no chance of the facing showing from the front,
similar to what I use.
4 - http://www.terryaskeartquilts.com/Studio/tips-tutorials-and-more/my-new-favorite-quilt-facing-technique/
I do use all four and have come to prefer the wrapped binding for large art pieces.

There is often a lot of material at all the edges, particularly with raw applique. The addition of a French bindings adds at least another four layers of material. And if it's finished by machine rather than hand sewing there can be up to 10+ layers of material. Some domestic machines can't handle that but even using the walking foot you can run into trouble in the form of thread breakage and skipped or uneven stitches.

The Envelope binding always presents that 'where will I turn the piece' issue and the subsequent finishing and stitching of the open edge. If the resultant seam is very thick it can be tricky to get things to lie flat. It's sometime hard to prevent the backing material from showing along the edges. I've tried to make that work for me, but unless you chose your backing material carefully it can look messy. The only way to tighten the edge appearance is to anchor the backing with a row of stitching around the whole perimeter of the piece. That totally negates its choice if you were trying to avoid thick layers as you now have double the thickness of the art piece plus the backing to stitch through.
It works great for lighter and thinner pieces or where the edges of the pieces are relatively clean of other fabrics ie the 'feature' is centered.

So for this one I wrapped the edges. It can be sewn in place with one circuit of the piece, trimmed and turned precisely. The only drawback is it needs hand finishing. I included the hanging sleeve in the construction.


I start by drawing, with marker a continuous line 1/4 inch outside the intended stitching line.
Four pieces of material about 3 or 4 inches wide are pinned in place on the marked line.
Two edges, I chose top and bottom, are wider and travel out over the edge. The other two sides stop just short of the drawn line.


I stitch 1/4 inch from the edge of the binding material using three stitches at each corner to ease the sharpness from the corner.


The corner is trimmed a little past straight.


When it is wrapped and stitched it can be tightened so the binding only visible from the edge. This results in a clean, straight edge. With a good pressing I don't need to stitch around the whole circumference to keep the binding from showing.


Show Ready!