Sunday 29 March 2015

New Pieces

My small group and I meet once a month to chat and to challenge ourselves and to learn. After our monumental push for the up coming quilt show we decided to revisit a fun and relaxing technique and to produce something simple and quick. Never trust the word quick. The time necessary to complete a project expands with the time given.

We meet again this week and "progress" is the key word.
I've combined two projects, the weaving and a second assignment, inspiration from a Paper napkin. Rolling them together for the concept/idea of Spring. ( Still below freezing here at night)

I recently did some weaving in an earlier project. My fabric was perfect.

 
 This second picture is the one I'm working with now.

 
Maybe not spring like? but this is made from my own hand painted cloth. The pale blues and greens soften the greys. Besides, my inspiration came from something similar.

 
So I scoured the internet for "how to make cloth Hydrangea" and sure enough there it was. All of their instructions use felt or silk but I had another of my fabrics I wanted to use.


Leaving the circles joined, they are hand stitched and drawn up like a "YO YO". This fabric was a little stiff but I was able to get some rather realistic colours. Stitching them to netting so I wouldn't have to sew them into shape on the already stiff quilted background, these little babies show promise for a lovely bouquet.
I guess I can go to my group now and show "progress".


Friday 27 March 2015

Customer Quilt Finished

I worked on this one off and on. It made a nice mental break when I would be unsure with my art.
While this quilt is a 16 patch and a 4 triangle patch, they went together and made a large "on point" diamond. So that was the feature I picked out when I quilted this.
The large diamond was first "boxed" and then filled with circles. As not all are "perfect circles", let's call this "boxed Pebbles" LOL


This is a king size, and wonderfully cheerful and bright.
And its just sad that the one block I photographed happened to have untrimmed threads. Sigh.


Thursday 26 March 2015

Prelude To an Afternoon with a Fawn - Final

I decided after all to enlarge this by about 2 inches all-around. It's not hard, just adding a few cobbled strips of canvas with a zigzag stitch. I was able to add a 2 inch complimentary border of green all around.


I added a few more leaves and ground foliage.
Then I found myself on line, trying to get a list of what deciduous shubs would be found in the forest.
Enough. I could play with this for  days.
Rather than lightening the rump of the fawn more, I darkened his chest and features facing away from the meadow. Other than his face being slightly foxy, he's cute.


So this exercise with backlighting was interesting. It did make me think a little more about light and where it would express itself.


On to the next piece ( ie finishing the quilt on my frame..tomorrow.)

Tuesday 24 March 2015

Fawn - Day 8

The Fawn is in place and all that needs to be done is detail.

I found the white edges were a bit distracting when I was trying to envision this as interior forest, so I edged the piece with a medium print. This defines the space for me as well. I no longer look past the edges in terms of what should be there.

I added some pale colours to the fawn to try to show some back light. I'm not sure I achieved that yet. But better too little than too much. I can add more.

I added a small branch in one corner , almost at the position of the observer. I'm debating more.
At the bottom, I started with some fussy cut herbs and a foam flower. I think I will add a few more of the flower. These I like.


Monday 23 March 2015

Prelude to an Afternoon with a Fawn

( Apologies to Debussy)
 As promised here he/she is.

Working with a cartoon from the picture, the outline was stitched onto the chosen backing and stabilizer. I used a commercial embroidery stabilizer this time because the long legs needed more support. Had I thread painted this in situ, it would not have been necessary as there is already so much fabric. There was the risk, however that the needle and threads would have laboured through all the previous stitching. This results in thread breakage and real annoyance.

 
I find I am using less embroidery thread for these natural scenes and more stronger quilting threads. They have no sheen and in some places such as this, I think it's better.
These threads and the larger needles do punch very large holes in the material but by the time it's done they have all disappeared under the layers of thread.

 
I don't often start with the lighter colours but seeing as most of the white on the fawn is feathered into the other colours I thought I'd reverse my process. After two shades of pale beiges but not white ( too strong to use first, ) it really looks like a dogs breakfast. Have faith! Even I get nervous.

 
but a few hours later....the finished fawn
 

Before I cut the cartoon away from the excess stabilizer, I press and steam it well. This tightens the stabilizer and the threads and directs the shrinkage evenly. All the wrinkled and puckers remain, and when they are cut away, the piece lies flat again. 

 
So here is the fawn in his quiet forest on a balmy afternoon. He still needs to be attached to the backing and while I'm doing that, I will feather the edges with the corresponding threads so, where natural, there will be some fluffiness to his coat.
 

Looks a little better than a paper cut out. Is this finished?
Far from it.
Detail!
More shrubs and more leaves. His feet need to be hidden so he's not floating and some larger foreground leaves will add more prospective. I'm still musing on enlarging this by another inch all around.


Sunday 22 March 2015

Almost Ready for the Fawn

Most of today was spent on the trees. Another million little snips for leaves.

 
By covering most of the sky it begins to make the foreground feel like inside the forest.


 I added more branches though a lot are covered with leaves.


Some thread painting on the background trees ties their detail together and breaks the solid colours into pieces. A few small saplings at the forest edge.......not much left to do. ( Well I could go on and on adding detail. )
Now for the Fawn........................

Saturday 21 March 2015

Fleshing out the Trees

Quilted till I ran out of bobbin thread.
So..
thought I said I'd work on the fawn, I turned to the branchless trees instead..
There are still a few limbs to come for the two main trunks, and lots of little thread painted ones before and after the leaves are applied. I spent about 2 hours placing individual slivers of cloth for the mid ground trees.

Friday 20 March 2015

Foreground on the First Day of Spring

I decided this morning to have a leisurely day and work on the fawn. Or rather, finish the foreground. I made a few million more pieces. These pieces are not leaves from the trees but lush spring growth on the floor of the forest. Foam Flower? Ginger? Large oval leaves were easy to make and apply.


Adding in some lighter colours adds a spot of sun on the forest floor. Applying these one by one with tweezers took on a rather meditative tone. Contemplating spring?

 
After covering the entire surface with "leaves" and layering it with the netting, it was stitched down.
I added the last 3 trees and a few more edges shrubs.
Paper Bambi now looks like he is inside the forest. with the meadow beyond.
Maybe tomorrow I'll start on the fawn.

Thursday 19 March 2015

Foreground for the fawn

After 3 hours of quilting this morning I tackled the landscape again.
Even I get bored with some of the necessary work, so I needed to jump ahead and work on tree placement. I've tried this a few times and this seem the best.

 
 The fawn is still paper. I've removed the very large tree that was in the original as it just seemed to cut the piece in half. I went with a younger forest. But the colour is all wrong, So I began what I thought would be a very tedious exercise, cutting millions of ovals, but it turned out to be so rewarding seeing the piece move forward I didn't notice the work at all.
It was necessary to darken the fore ground first. The multi laid down was intended as show through or background. The forest floor is never one colour. Layers of leaves can be many shades of yellow and brown. The newer growth pushes up through the duff.

 
I put down a layer of dyed cheese cloth before I applied the leaves..one by one. They are anchored with only a few stitches but caught and protected by netting.
By the time I finished this afternoon, I had started in with 3 different material colours for the leaves. There will probably be many more.
I did go back and finish the green grassy area, threw in a forest edge shrub, and then placed four trees.
Now it feels like progress has been made. The light area at the rear makes sense.

Wednesday 18 March 2015

Background for Backlit Fawn

My day is divided by necessity. Customer quilter and working on the background for the fawn. Throw in trying to do the gym 3x a week and visiting friends in TO yesterday, I sometimes feel I don't move forward fast enough.
I don't like switching genres everyday but both my projects are crowding my sleep. The quilt is over half done and the trees are encroaching the grass.

I have no straightforward plan for this piece. I left it last time wondering about the colour thread to use on the green areas. I was going to place some trees on the right but today? I simply moved them to the left and the green became natural shadow on the meadow's edge.
As this exercise IS the background, I haven't begun the fawn yet. That's not an issue. IT will appear when needed.

So the trees are in full sun and they needed to reflect different shades of green. I have two. I don't know at this point how many more I will add to the grassy area.


The initial layer is green chiffon, a little light green as a filler and edge. This is far from finished. Each additional piece I apply I finish fully as if it were standing alone. I may cover it but I learned its much harder to fill the background when its covered with other stuff. This is right on the edge, but I'm half thinking this is going to end up wider.

Monday 16 March 2015

Finally Passed Through the Creative Block

Being in Limbo IS purgatory for me. Between projects drives me crazy. This has been an unusual year with the Guild show coming up fast now and doing five pieces for shows rather than for me. It's not a question of being outside my comfort zone, it's that the inspiration wasn't necessarily mine. This is a problem I have when I accept custom work too.

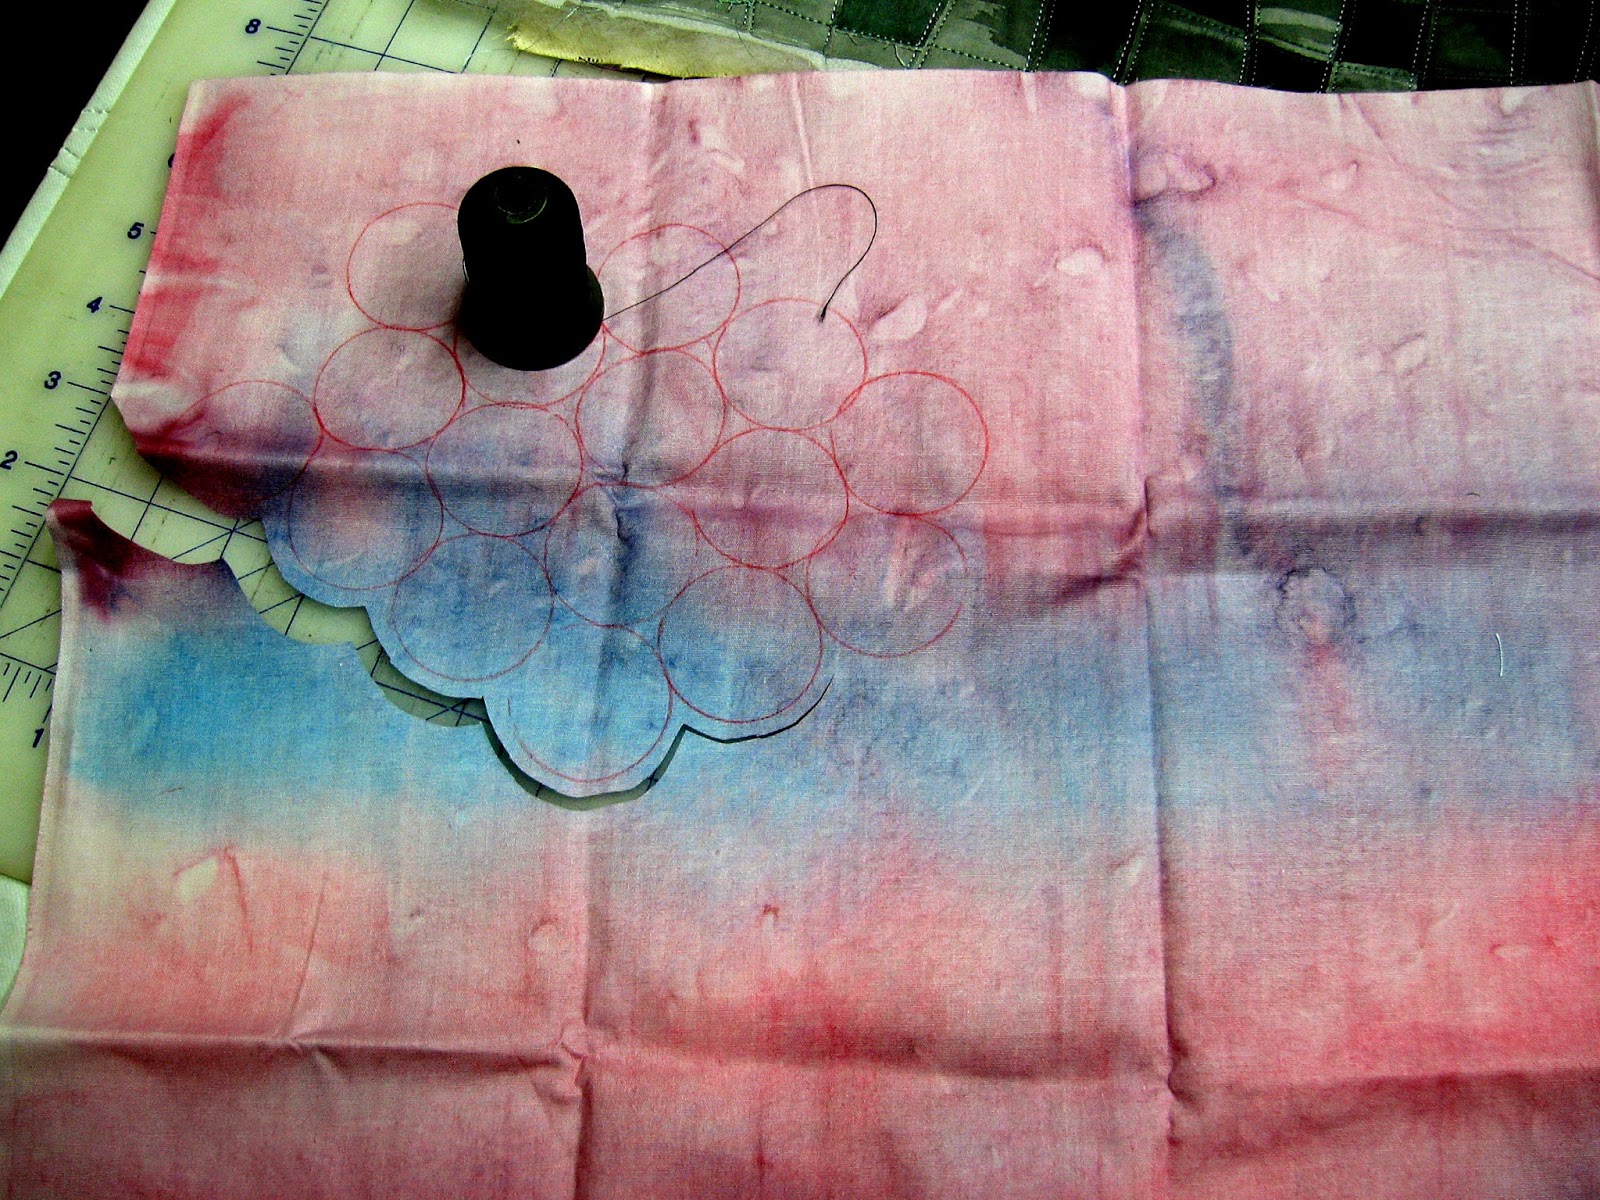
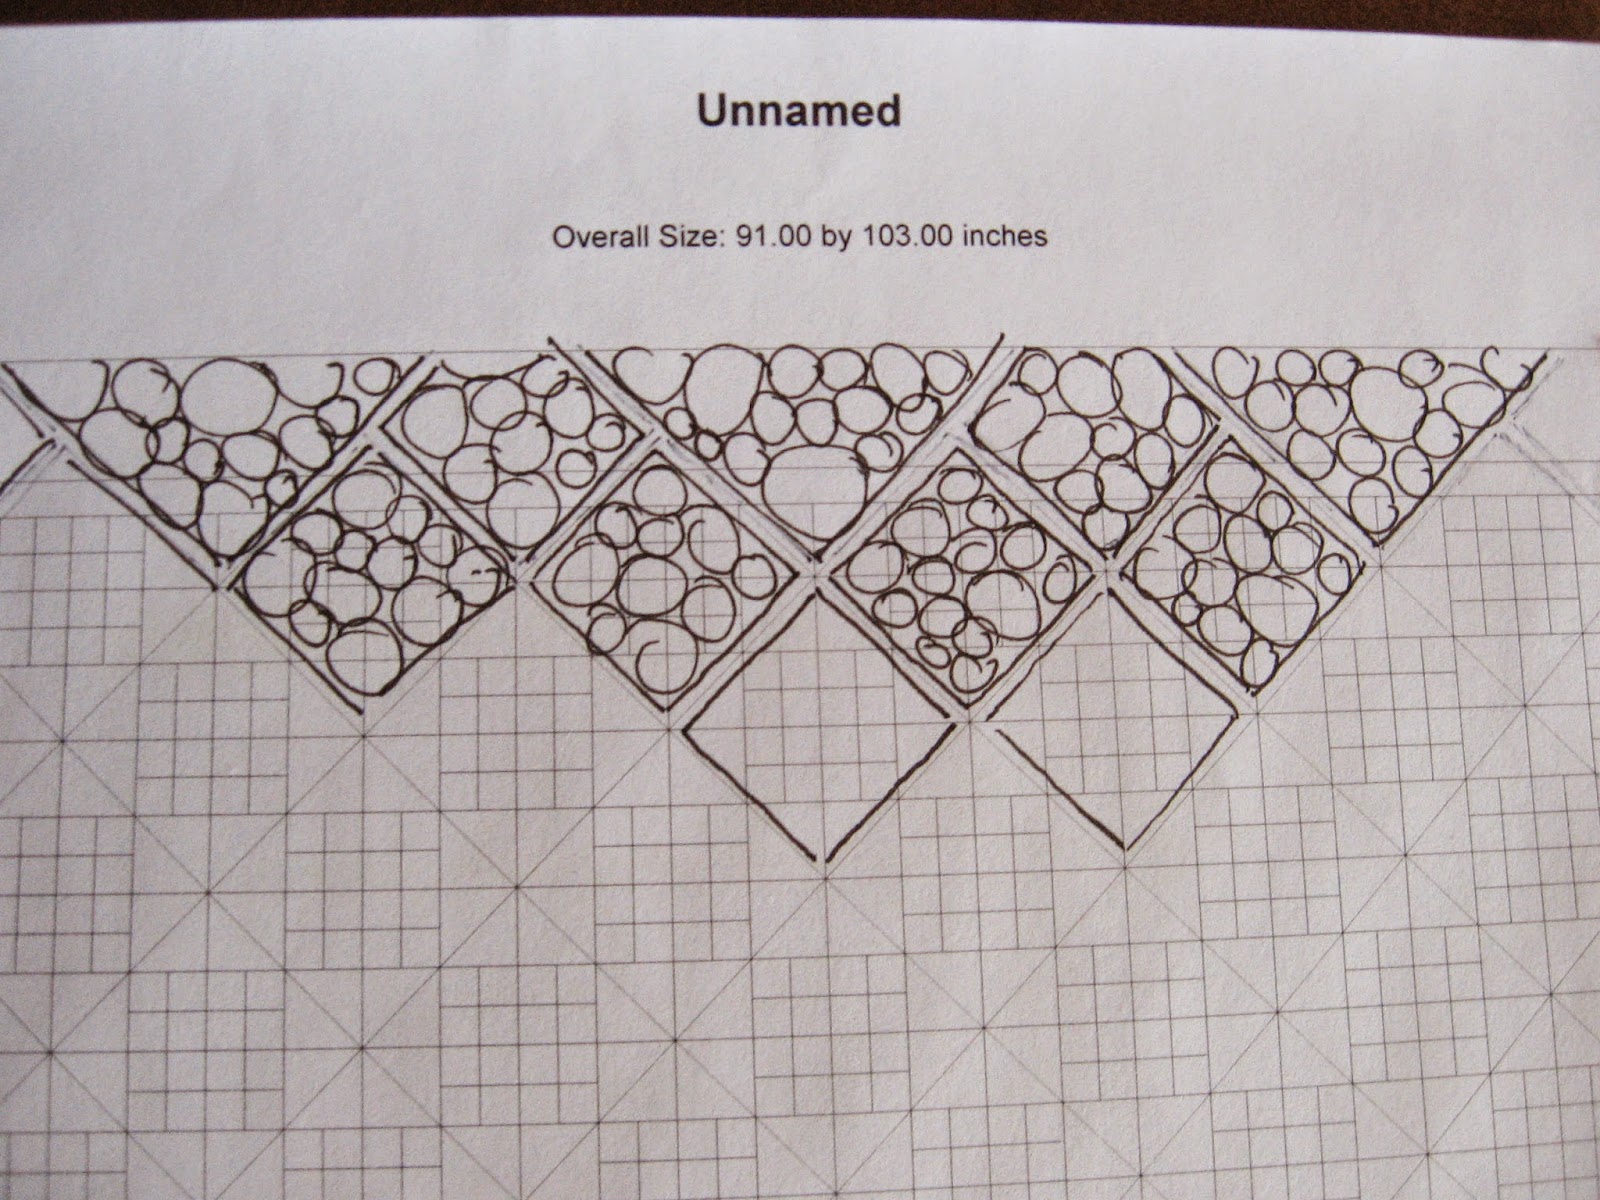
So I was glad to have been given a quilt to make show ready. It takes my mind off my BLOCK. It's coming along. It's about half finished. I'm quilting what I call boxed pebbles. It's a tad fiddly and requires focus. Just what I needed to stop monkey minding over my art quilts.


I DO have a project I was avoiding. And funny enough it was my input that got this one selected.
Light.
I've been aware for quite awhile that the lighting in most of my work is  "bright overcast" day. No real shadows or contrasts. There are lots of books that address and in fact my own guild has an extensive library that covers this point. But most of the solutions there involve careful cutting and inserting lighter values. I've grown away from a lot of seams in my work opting for raw applique. Whether that's a good thing is up for debate but that's what prompted this dilemma. No contrast.

It probably doesn't speak well for me when I feel I need to produce pieces with commercial value. But its a real restraint. So in response to my Landscape group's decision to choose a photo with back lighting, I hunted until I found a recent "Weather Channel" fawn. It has back light.
I didn't want to do this as a 8x10, and I didn't think it would look its best if I enlarged the fawn to 24x36, so I decided to expand the background.
I ended with two photos in addition to the fawn and my goal was to join them.
And use my own fabric.


I did have a piece from last summer with bright yellows and greens so I decided to start with that. But I was far from happy. Pairing it with commercial fabric just left me cold.
So it went up on the wall to be ignored and stared at while I worked on the king size quilt.


I finally came to the decision the only way to marry the whole thing was to Thread Paint the entire piece. I can honestly say I don't think I've EVER done that.
But I dove in today, (after 2 hours on the Quilt.....getting up my nerve I think) and I have finished the yellows.

About 10 shades of thread in colours from taupe to pale yellow green were used. I used a lot of plain thread as opposed to embroidery thread as it has no gloss. Where I did have to use the glossy thread I over stitched it to bring down the shine.


The next step is to finish the green in the background. The trees also need more treatment but I'm happier now.

Saturday 14 March 2015

Combating Cabin Fever - Snow Dyeing

If you're not a winter sports enthusiast this is a pivotal time for those who live in the northern climes.
Cabin fever is real and it can be the most depressing and unproductive time of the year. We all scurry to find things to take our mind of the dull grey whether, and the dirty views as the snow begins to retreat.

After attending one of my group meetings, I had to rush home and try some SNOW DYEING. Basically rumpled fabric, damp and covered in snow with dye drizzled over. I used powdered RIT, because that's what I have. Leave it for roughly 24 hours, drain, rinse and Voila! Painted fabric.


WOW!
This has possibilities.  The key will be the rumble.
Too bad winter is almost over!!!!!!!
NO! Perish the thought.
I want it to end now, but I think I can squeeze in a little more of this before the snow is all gone.

Today? No! I'm off to feed my winter crazy in TO. Going to the Fawlty Towers Dinner theatre. Hope to laugh my self to a better mood.....and SPRING (in one week), after a very long winter.

Monday 9 March 2015

Ooo - Quilting...That's new!!

Crunch time for some, particularly those wanting to enter a quilt in out guild's show in May.

I've got plans for this beauty, but my hold up is deciding how to quilt the edge: a continuation of the main motif , a separate item or a combination. This is one place where I really appreciate my EQ. I can duplicate a pattern, and print it to doodle on.


This is a EQ mock-up using my colours. This picture is yellow and the actual quilt is not.


Doodling is an important part of custom work. I have no computerized set up for my machine so all the quilting I do is free motion, or with my own custom pantograms.

This will take me a few days.
Steady work?
I think not.


We have agreed on the design. Boxed pebbles.
So doodles for the edge. Choices?


I totally ignore the fact there is a band and a 5 inch border, I can continue the pebble pattern right to the edge.

                             or


I partial extend the LAST pattern into the border and then fill the remaining boarder with pebbles.


                                                                                     or


I treat the border as a separate entity.


                               or


I partially extend a modified pattern into the border giving it a bit more emphasis.


I'll have to sleep on this for a bit, because I start with the border.
I'll let you know and post a pic when its done.