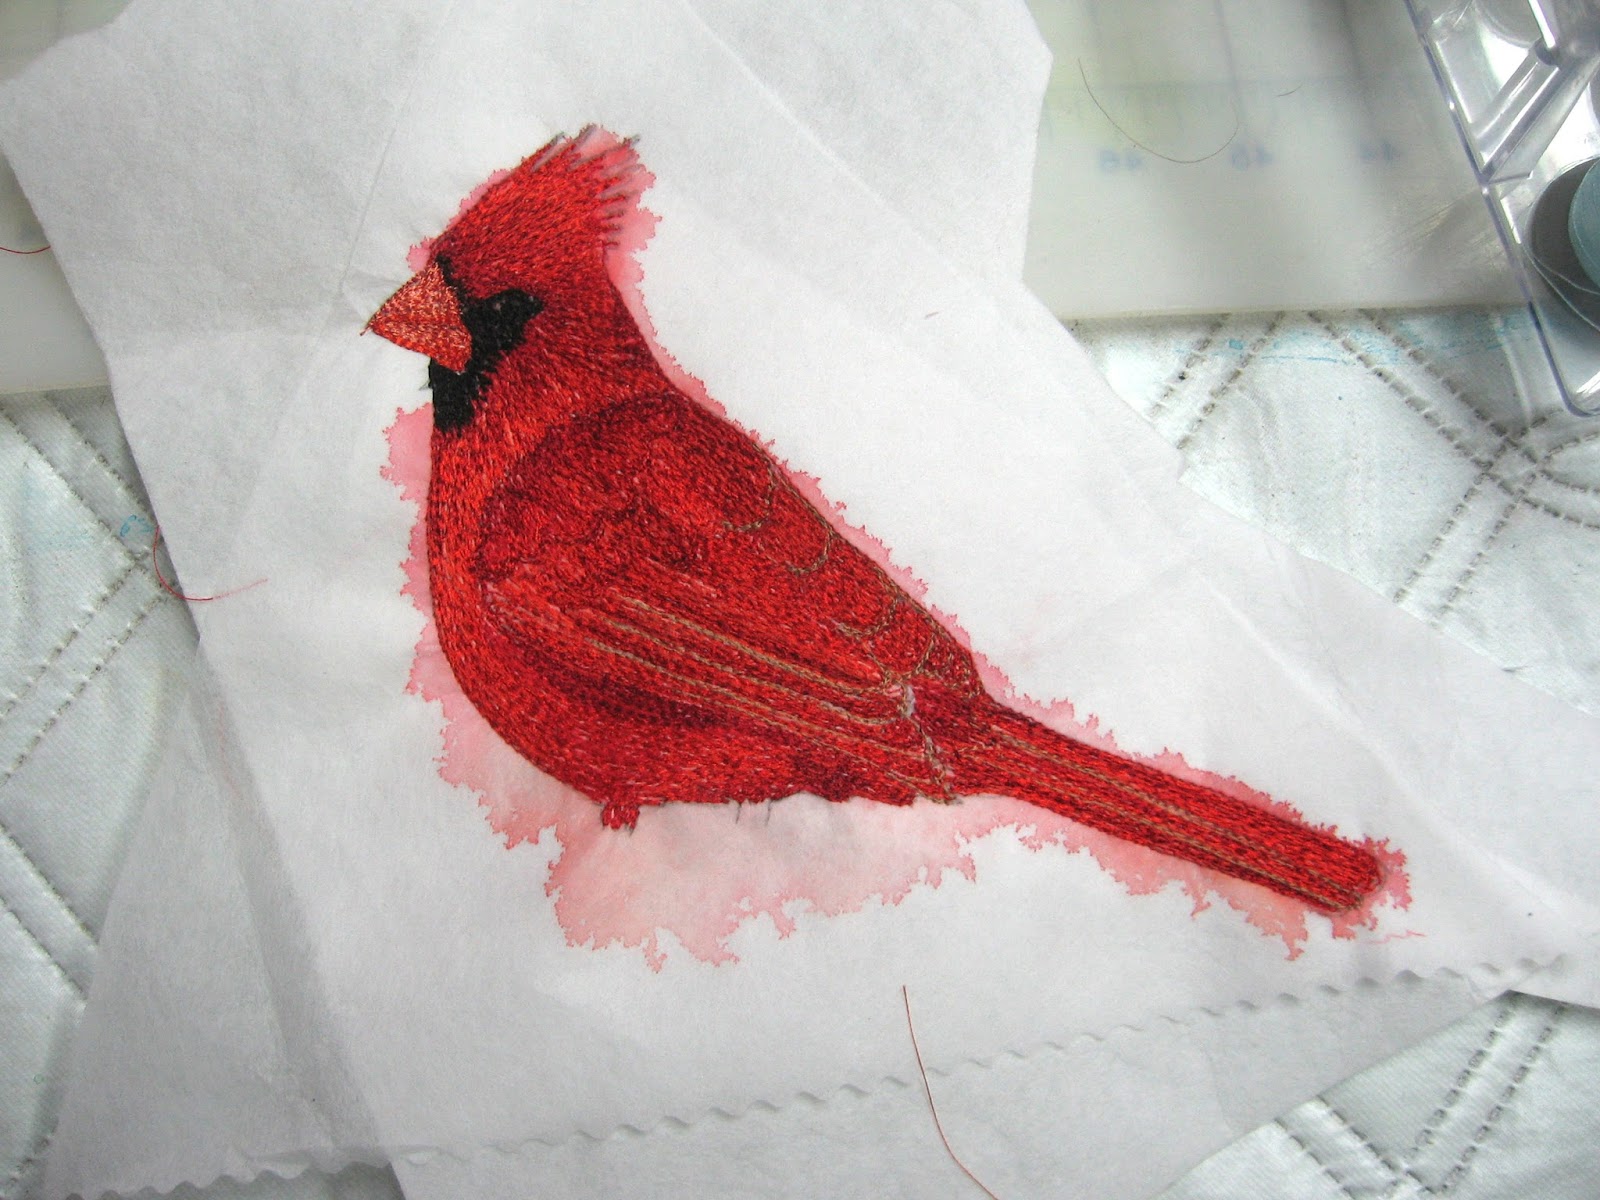
Just a little more on either side and then the bottom needs to be 'adjusted'
Showing posts with label applique. Show all posts
Friday, 29 May 2020
Monday, 25 June 2018
Remember Sinchies?
Back in April of this year I showed some of the 11 Sinchie blocks I was challenged to make . They were all prescribed, 2 colour, 6 inch blocks.
Our Fibre Arts Group got together this morning for our first attempt at assembling them as a unit for our September Guild Quilt show.
I think we were all rather impressed with each other's efforts.
We'll mount them together later this summer. For now here's a sneak viewing.
Our Fibre Arts Group got together this morning for our first attempt at assembling them as a unit for our September Guild Quilt show.
I think we were all rather impressed with each other's efforts.
We'll mount them together later this summer. For now here's a sneak viewing.
Sunday, 1 April 2018
Saturday, 31 March 2018
Friday, 30 March 2018
Saucy Ladies - Day 2
This is going very smoothly. I think I had made all the decisions before hand.
I kept the background simple and uncluttered with minimal stitching.
The girls are in place, anchored but the edges are only partially sewn down.
I have the hair for the gal on the right, but I need to go to the store tomorrow to find a red or orange mitten to unravel for the hair for my other lady.
And the shoes.
I made a beach. Heels don't seem right? But they are the easiest.
Colour?
Don't know yet.
I kept the background simple and uncluttered with minimal stitching.
The girls are in place, anchored but the edges are only partially sewn down.
I have the hair for the gal on the right, but I need to go to the store tomorrow to find a red or orange mitten to unravel for the hair for my other lady.
And the shoes.
I made a beach. Heels don't seem right? But they are the easiest.
Colour?
Don't know yet.
Thursday, 29 March 2018
Friday, 5 January 2018
Landscape Samples
Our workshop date is a week from now. In addition to assembling material packages for each participant, I have a few samples to finish.
In this instance I focused on colour only. For all 3 I used the same basic landscape design, not too far off the natural landscape of the Georgetown area, a neutral view they would all be familiar with.
I chose colours from my scrap bags to represent 3 seasons: winter, summer and autumn.
Tomorrow I'll 'tart' them up a bit with some thread sketching.
In this instance I focused on colour only. For all 3 I used the same basic landscape design, not too far off the natural landscape of the Georgetown area, a neutral view they would all be familiar with.
I chose colours from my scrap bags to represent 3 seasons: winter, summer and autumn.
Tomorrow I'll 'tart' them up a bit with some thread sketching.
Tuesday, 24 October 2017
Childrens' Art
All of us have been delighted and amazed when our wee one brought home school art. Some delight us with the colour and some amaze us with the interpretation of subject. Some display them for the appropriate time or until they are displaced by another equally wonderful picture. Some of us keep them forever.
I happened upon this picture when visiting with a relative. It was crayoned by a 4 yr old and held a place of honour, on the wall under glass.
I'm sure you'll agree the colour blocking is wonderful and the lolly pop red of the Balloon and the colours in the basket just draw the eye. So I decided to gift them with my rendition of their grandson's work.
However........what size?
The same size,.. 8x12 might be interpreted as a replacement for the original. That's not my intention.
This is enlarged to 36x48. With a suitable border it will be large enough to be useful as a lap quilt as they watch TV.
The basic outline is very simple so the fabric choices become very important.
I tried to use only my own material as some of it had the scribbly and patchy look I wanted to imitate.
And seeing as this quilt will be washed I rewashed all my own painted and dyed material with sythropol.
Using the master outline I quickly cut the different shapes.
The basket material worked up a bit TOO regular, but I can live with that.
So here are the colour blocks in place.
They're only glued at this point while I decide the rest.
The heavy black lines?
I have several choices. I could satin stitch or I could couch some stands of wool in the place of the rayon marks. That's the way I'm leaning at the end of this day.
I happened upon this picture when visiting with a relative. It was crayoned by a 4 yr old and held a place of honour, on the wall under glass.
I'm sure you'll agree the colour blocking is wonderful and the lolly pop red of the Balloon and the colours in the basket just draw the eye. So I decided to gift them with my rendition of their grandson's work.
However........what size?
The same size,.. 8x12 might be interpreted as a replacement for the original. That's not my intention.
This is enlarged to 36x48. With a suitable border it will be large enough to be useful as a lap quilt as they watch TV.
The basic outline is very simple so the fabric choices become very important.
I tried to use only my own material as some of it had the scribbly and patchy look I wanted to imitate.
And seeing as this quilt will be washed I rewashed all my own painted and dyed material with sythropol.
Using the master outline I quickly cut the different shapes.
The basket material worked up a bit TOO regular, but I can live with that.
So here are the colour blocks in place.
They're only glued at this point while I decide the rest.
The heavy black lines?
I have several choices. I could satin stitch or I could couch some stands of wool in the place of the rayon marks. That's the way I'm leaning at the end of this day.
Friday, 24 March 2017
Cardinal - Courting Pair
These two complete the group I wanted to do for now.
Again a slightly different method. This time I coloured the cartoons with a water soluble pencil. Paint in a pencil form. I do like these.
Papa came first. In retrospect he was harder to do than the female in spite of her "interesting " colour. Just what shade of red IS he. It all depends on where and when you see them or in my case which photo I chose to work from. There is a surprising amount or orange red in this guy.
My first impression of the female was that her colour was predominately olive green, but again light paid a great role here.
So here is the courting pair.
I can almost believe Spring is here.
Again a slightly different method. This time I coloured the cartoons with a water soluble pencil. Paint in a pencil form. I do like these.
Papa came first. In retrospect he was harder to do than the female in spite of her "interesting " colour. Just what shade of red IS he. It all depends on where and when you see them or in my case which photo I chose to work from. There is a surprising amount or orange red in this guy.
My first impression of the female was that her colour was predominately olive green, but again light paid a great role here.
So here is the courting pair.
I can almost believe Spring is here.
Thursday, 23 March 2017
Bird 3 - Bluejay
I only did this one, today. It took almost 4 hours.
There were 5 shades of blue, 3 white plus black and grey, primarily regular thread and a little embroidery thread near the end to add a touch of sheen. I decided it really wasn't necessary for a lot of the early stitching and it is significantly more expensive.
A lot of twitch muscle work, small movements, so I had to take a lot of breaks.
I chose to do this fellow with out a hoop, ( just to shake things up a bit ) with a light interfacing, coloured, on a light stabilizer. Midway I added a heavier stabilizer because it began to distort a little too much.
This is now ready to "cut out" and stitch onto a background.
There were 5 shades of blue, 3 white plus black and grey, primarily regular thread and a little embroidery thread near the end to add a touch of sheen. I decided it really wasn't necessary for a lot of the early stitching and it is significantly more expensive.
A lot of twitch muscle work, small movements, so I had to take a lot of breaks.
I chose to do this fellow with out a hoop, ( just to shake things up a bit ) with a light interfacing, coloured, on a light stabilizer. Midway I added a heavier stabilizer because it began to distort a little too much.
| coloured cartoon |
| Undercolour with serging thread |
| some white and black added |
This is now ready to "cut out" and stitch onto a background.
Sunday, 19 March 2017
Saturday, 18 March 2017
Flying Geese - Day 3
Except for a 2 hour skype with my sisters, I worked on this from 10 till 5. Long slow, careful day.
The three were joined at their intersections and the excess velour cut away.
Locating them on the quilt was not an issue, but, whereas their feet were originally on the same plain, the gradual distortion of the body placed them at different heights. While within a inch of each other I hadn't added that much additional fabric to compensate, so they were stitched separately, though they're all level to the lines of the quilt.
The three were joined at their intersections and the excess velour cut away.
Locating them on the quilt was not an issue, but, whereas their feet were originally on the same plain, the gradual distortion of the body placed them at different heights. While within a inch of each other I hadn't added that much additional fabric to compensate, so they were stitched separately, though they're all level to the lines of the quilt.
Friday, 17 March 2017
Flying Geese Quilt - Day 2
I decided yesterday I wanted something luscious for the bellies of the geese, something touchable. I found a lovely white velour at our local shop and went to work
As this applique is being finished off the quilt I spent some time quilting the velour onto batting and a light backing. Why all that? The dark colours of the quilt showed through. The addition of a small piece of old sheeting was the trick to make it opaque.
Adding the geese was a little more tricky. Stitching a piece of thin bias cut turned edge material over a quilted and plush background was slow work.
Even though I pinned I had to constantly adjust. So the geese are little fatter. haha!
I have two done. Tomorrow should see the three on the quilt.
As this applique is being finished off the quilt I spent some time quilting the velour onto batting and a light backing. Why all that? The dark colours of the quilt showed through. The addition of a small piece of old sheeting was the trick to make it opaque.
Adding the geese was a little more tricky. Stitching a piece of thin bias cut turned edge material over a quilted and plush background was slow work.
Even though I pinned I had to constantly adjust. So the geese are little fatter. haha!
I have two done. Tomorrow should see the three on the quilt.
Thursday, 16 March 2017
Flying Geese Quilt
Back in Dec. /16 I assembled a quick and easy FG Quilt. And then it sat on my design wall for all this time. It was really inexpensive and it's only 50x70, but I wanted to give it an interesting and unique finish because I liked it. The balance and harmony of the pattern and kit materials were really nice.
But it hung on the wall for 4 months mocking me as I rejected idea after idea. I finally put all the pieces together last night (about 2:00 AM in my night wanderings).
I went back to one of my earlier ideas and finally worked out the "how".
This is a photo of a piece I created in 2011, a copy of the iconic work of Benjamin Chee Chee, one of Canada's unique indigenous artists. Like a lot of marginalized peoples in North America, he died too soon.
I wanted to feature these geese on the quilt. BIG GEESE!
Today I quilted the top. Then I turned to the geese.
Using a projector I enlarged them to 40 in in height.
I'll probably spend a few days finishing these for applique onto the quilt.
But it hung on the wall for 4 months mocking me as I rejected idea after idea. I finally put all the pieces together last night (about 2:00 AM in my night wanderings).
I went back to one of my earlier ideas and finally worked out the "how".
This is a photo of a piece I created in 2011, a copy of the iconic work of Benjamin Chee Chee, one of Canada's unique indigenous artists. Like a lot of marginalized peoples in North America, he died too soon.
I wanted to feature these geese on the quilt. BIG GEESE!
Today I quilted the top. Then I turned to the geese.
Using a projector I enlarged them to 40 in in height.
I'll probably spend a few days finishing these for applique onto the quilt.
Thursday, 29 December 2016
Back To My Art - Finally!
Christmas is over. Most of the mess is cleaned up and NOW I can start thinking about creating once again.
I've pretty well got my new machine figured out, but the manual is handy in a drawer.
I've spent a long time trying to decide whether to try for an out door show in TO this June. Spending an afternoon with my daughter ( the graphic artist and master of sunsets over water) I've committed to her. That means She's going to hound me to do this.
I spent a few days "resting" in front of the computer going through all those photos I had squirrelled away in files and Pinterest and pulled out about 20.
I'll mentally work through the logistics of each piece before I even select any material.
But I needed to warm up today so I selected a small piece with an interesting technique.
A moon reflected in water sounds straightforward enough but this one uses an interesting approach.
This was my moon material. It also end up being the reflection materials as well.
The night background is reverse appliqued onto the lighter material.
Then little slits are cut out of the background and the yellow reflection shows through. Very straightforward.
Now it just all needs stitching.
Enough for today.
I like it. It's cute...not great but a clever and simple approach.
I'll finish the "water" with a few different coloured threads.
I've pretty well got my new machine figured out, but the manual is handy in a drawer.
I've spent a long time trying to decide whether to try for an out door show in TO this June. Spending an afternoon with my daughter ( the graphic artist and master of sunsets over water) I've committed to her. That means She's going to hound me to do this.
I spent a few days "resting" in front of the computer going through all those photos I had squirrelled away in files and Pinterest and pulled out about 20.
I'll mentally work through the logistics of each piece before I even select any material.
But I needed to warm up today so I selected a small piece with an interesting technique.
A moon reflected in water sounds straightforward enough but this one uses an interesting approach.
This was my moon material. It also end up being the reflection materials as well.
The night background is reverse appliqued onto the lighter material.
Then little slits are cut out of the background and the yellow reflection shows through. Very straightforward.
Now it just all needs stitching.
Enough for today.
I like it. It's cute...not great but a clever and simple approach.
I'll finish the "water" with a few different coloured threads.
Tuesday, 19 July 2016
Yellow and Green - Forest Scene
In this case, more is better.
I decided I needed to make "plenty circles" of various sizes before I would have a clear view of where this was going.
The first things was to make templates. I used a file folder and made 5 different sized circles, ranging from 4 inches to 8 inches.
There are many ways to make appliqued circles and I've probably tried them all. Some work better under different circumstances. I knew I didn't want turned appl., that would take forever. I'd made reverse appl. as well but this was not the place as the background was bulky. Sewing two circles together and inverting them gives a nice edge, but as I was layering many circles, I was afraid the buildup on edge material would become cumbersome.
So I went with the tin foil method.
First, trace and cut the material about 1/4 inch bigger than the template all around.
Lay the material wrong side down on tin foil and place the template in the centre.
Roll up the edges of the tin foil and Iron.
After removing the material from the tin foil and the template from inside., run a line of glue (I use school glue sticks) all around the crease. Iron it down carefully using a pair of tweezers to position the fold to get a nice round circle.
I just pinned them onto the background for a feel of what I can do with this. I think I will add more and different materials in small patterns.
Looking at this I'm feeling flowers instead of trees.
That would work also.
(Look how nice my new yellow fabric shows on the green!)
I don't know yet where this will go.
I decided I needed to make "plenty circles" of various sizes before I would have a clear view of where this was going.
The first things was to make templates. I used a file folder and made 5 different sized circles, ranging from 4 inches to 8 inches.
There are many ways to make appliqued circles and I've probably tried them all. Some work better under different circumstances. I knew I didn't want turned appl., that would take forever. I'd made reverse appl. as well but this was not the place as the background was bulky. Sewing two circles together and inverting them gives a nice edge, but as I was layering many circles, I was afraid the buildup on edge material would become cumbersome.
So I went with the tin foil method.
First, trace and cut the material about 1/4 inch bigger than the template all around.
Lay the material wrong side down on tin foil and place the template in the centre.
Roll up the edges of the tin foil and Iron.
After removing the material from the tin foil and the template from inside., run a line of glue (I use school glue sticks) all around the crease. Iron it down carefully using a pair of tweezers to position the fold to get a nice round circle.
I just pinned them onto the background for a feel of what I can do with this. I think I will add more and different materials in small patterns.
Looking at this I'm feeling flowers instead of trees.
That would work also.
(Look how nice my new yellow fabric shows on the green!)
I don't know yet where this will go.
Subscribe to:
Posts (Atom)