Showing posts with label embroidery. Show all posts

Monday, 25 June 2018

Remember Sinchies?

Back in April of this year I showed some of the 11 Sinchie blocks I was challenged to make . They were all prescribed, 2 colour, 6 inch blocks.
Our Fibre Arts Group got together this morning for our first attempt at assembling them as a unit for our September Guild Quilt show.
I think we were all rather impressed with each other's efforts.
We'll mount them together later this summer. For now here's a sneak viewing.


Saturday, 23 September 2017

Snow Days Flimsy Assembled

I've had to make a list.
I was juggling so much in my head that I wasn't being very efficient ( Oh my mother would shake her finger.)

So first on the list was to assemble this quilt top.
I placed a safety pin in every location that needs some additional embroidery, either into the quilt blocks or to link two scenes together.
Now, this is evening hand work, so it will be a few weeks before I consider the quilting.
I was toying with hand quilting this one as I did enjoy working on the "Stickle" quilt, but there are some rather daunting corners with a lot of material so I'll have to think about it for a while.

In the meantime here is the layout.


There were times I was a little leery of my fabric choices but I think the balance worked out. This is sideways so my shadow didn't fall on the top. The rest are shots moving around the quilt CCW.


Monday, 11 September 2017

Snow Days - All the Blocks Complete

Lots of cutting and lots of breaks. The instructions were very clear as long as you remembered they were for one block. It was easy to overlook just how many of each piece or each size you needed, so I organized a system and only messed up once.

The three sizes made for a nice break and encouraged some thoughtful use of the limited materials I had selected. I found it was most efficient and relaxing to cut and assemble each size separately.
The only solid fabric I used was my walnut stained material. I used 3 different shades.

I only have a few small pieces left to embroider. The centre of the quilt is surrounded by the embroidered pieces so I can start assembling that tomorrow.

😉


Wednesday, 30 August 2017

Embroidered Blocks

I found working on these quilt blocks, one of a series of nostalgic quilts from Meg Hawkey, very relaxing. Maybe that's because I stitched them on the couch, in front of the TV every evening.

This quilt is called Snow Days.
I've most of the embroidery done and I can soon start on the blocks that they are embedded in. Some of the embroidery will climb off the light material into the pieced blocks. That was one of the charming things I liked about this pattern.


Tuesday, 21 February 2017

New Quiet Time Handwork

Ever since all the "jane" blocks went together and were mounted on the frame, I've had no quiet work, work I could travel with or sit out in the summer yard to work on.

So this weekend I started on a pattern I purchased last June.


I had been assembling the material for this over the year. I've chosen some FQ and with my last purchase of shirts from the thrift shop I' think I'm all set.


This involves embroidery both on separate material AND on the adjacent blocks. I thought it was unusual and charming. There is a whole series of these available.

So on my Family Day weekend jaunt to the Thornbury cottage, ( the ice IS out) I started the fist of sixteen "Pre" panels. These will all be joined to make a continuous loop of embroidery around the quilt . I'm rather excited about this one.


Friday, 8 January 2016

Today is a " meh " Day

When I know I have appointments and things to do that will interrupt my day it's hard to really get into much.
I finished DJ block 24, ( yea me ) and I started "tarting up" my 25 trees.
Yesterday I took the plunge and bound the edge with black and a silver flange. It's not perfect. I always have trouble matching that flange edge when I join the two ends.


My intentions are to cover this piece with small small birds and animals. I stitched a couple of blue birds........they're ok but I lost interest. Maybe it has something to do with the idea that I was planning on around 100. Well I have time for that.

 
Then I had the brain wave to add some apple trees.


And them I thought some acorns or oak trees...with a few squirrels. Okayyyyy ...


Now I just want to eat.
Time to go out! 

6:00 PM ( Hubby's cooking ) I just finished this green wedge.  (23)


It occurred to me, during my philosophical musings, ( you spend a lot of time in your head working on these blocks ), the concept of women's education being lesser than men's. The maths? It was subtle. The centuries and decades women sewed clothing, and quilts they dealt with sums, fractions, geometry, tessellation, rotation and drafting. 

Think about it.

Tuesday, 6 October 2015

Just a Little Chickadee

A few of my friends have expressed an interest in a detailed tutorial on stitching Birds.
I've been commission to do a Blue Jay and will start that soon, but as I have all the materials for the series of Chickadees I'm making, for my up coming workshop, I paused and took a few extra photos this morning to show the steps in greater detail. Short of a video (which for now is beyond my abilities with the Internet), here's a step by step photo essay.

As I'm hooping these birds, I'm able to use a really lightweight material. Tearing is the only issue here. If that happens to you, then a double layer or heavier non woven stabilizer will help solve that issue.


All these little guys were traced from sized Internet photos. As I was doing a number of them, the spacing was based on the size of the sketches, as well as the size of my hoop. This example is on an incomplete piece of stabilizer. I don't recommend that for your first attempt. You want all the edges to be firmly anchored.


Each sketch was roughly filled with their appropriate colour. I used Seta colour pens but any fine tipped pens should do the trick. Even colour pencils or crayon (ironed to remove the wax) will work. The idea is to guide you, as well as provide some back colour to help conceal holes in the stitching.


You might have noticed the masking ( painter's ) tape on the hoop. This helps control the fabric from slipping as its worked under the needle.

I started with the white. The use of short or long stitches depends on your speed comfort and the type of thread.  Embroidery thread in short stitches really negates its use. The gloss and colour shows best with longer stitches. However then you have to be more careful with the stabilzer/hooping as long stitches tend to distort the material more.
For that reason, I discourage my workshop participants from using embroidery thread this time around. Regular thread and quilting thread are perfectly serviceable. In fact the thicker threads fill faster. All but the grey threads here, were quilting thread.

As I intended to blend 2 more colours on the belly of this guy, I finished the colour division edge in a very irregular line.


The next colour a buff and the third a beige give a shadow and dimension.


The grey feathers were done with a dual purpose thread, primarily because they were the colours I wanted.


There are two colours here, one as a filler and the darker one to outline. I did a few with black and for the most part they are okay, but I thought they might seem a tad heavy for some.


The black for the head and throat is the finish for this guy.
Adding legs and feet is best done when the bird is in situ, on the background.
I've anchored birds in a couple of manners. A blind hem stitch with an invisible mono filament works very well, but if you want a ruffled feather appearance, using a free motion stitch with the appropriate colour puts it INTO the background rather than on top.


Getting those sharp points on the feathers and the beak can only be done on the background.

So I hope this encourages some of you to try your hand.
Its lots of fun!

Saturday, 7 February 2015

Spring - Day 3

This little guy is almost finished.

I have to think about how I placed a few thread leaves in the center.
I'm not sure they are right.
I'm not sure I can remove them.
I may cover them.
But that's tomorrow.

Monday, 2 February 2015

Couldn't leave it alone


This little guy, cute as it is just wasn't finished. This morning I over stitched it with an outline of a Spider chrysanthemum. Perfect to take my mind away from the foot+ of snow that fell last night.


I have wonderful neighbours and, bless his soul, he blew my driveway this morning, something that would have taken both my husband and I the whole day to do by hand.

Tuesday, 9 December 2014

Tofino Bound - Forest Floor

After talking with a few members of this group I discovered we had ( at some Point that I missed) decided not to enter this as a group project. Every man for himself!
So I finished it today.
Cut it down about an inch, bound it and then remounted it on an asymmetrical backing.
I'm rather satisfied with this.


Looks rather dark and damp......, and that's how it is!

Thursday, 4 December 2014

It's All Fun

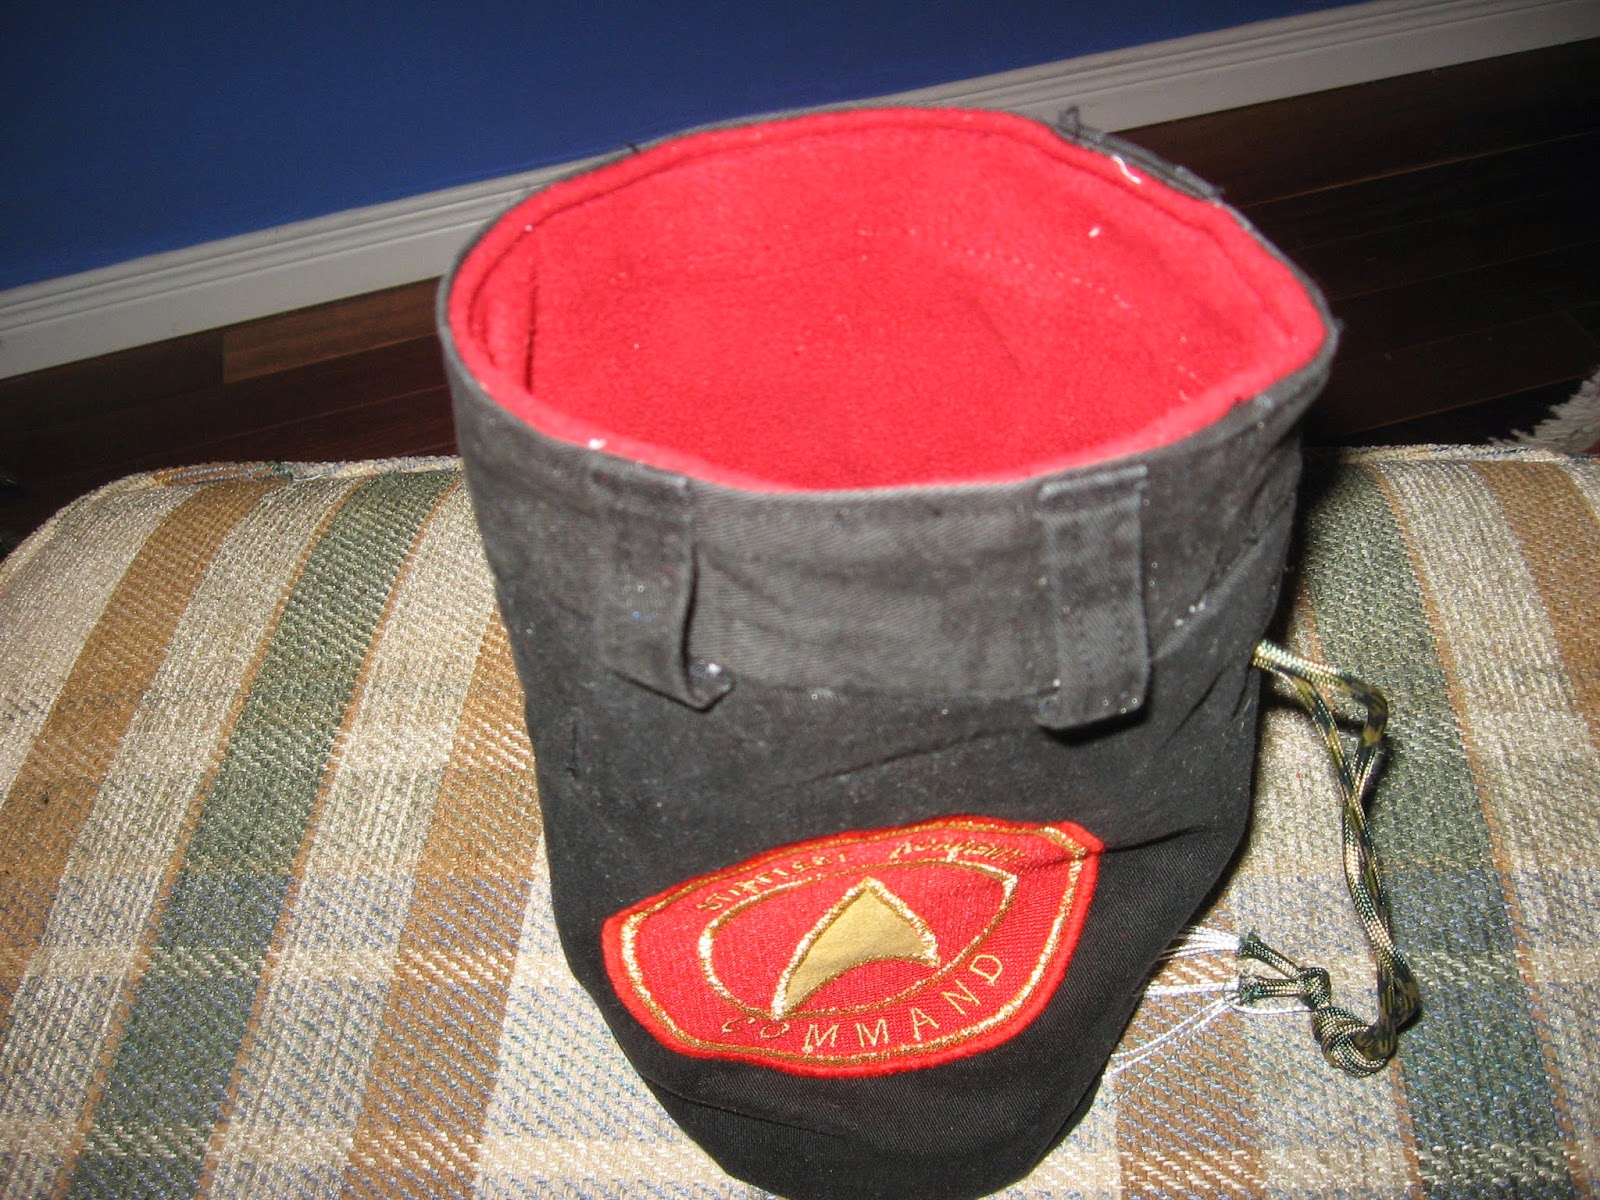
My son, the climber, asked if I could make him a chalk bag, (dries the sweat while climbing and hangs from their belt.) He has one, but he has large hands and finds the commercial ones restricting and inconvenient, particularly at the wrong time, 500 ft in the air. I have trouble looking at his photos.

I asked what colour, and he said a "Star Trek" one would be the coolest one at the gym.........

I have to explain that he was weaned on Comic con Conventions. He attended the first one in Toronto at my side. What? Is it so surprising that a high school Chemistry teacher, would LOVE the science in the series. ( I also watched the original at lunch time when we were home from elementary school.) (Shatner for Prime Minister) LOL

Some quick internet search and I found a "how to". So after a trip to a second hand clothing store, I returned with a pair of black pants and a red fleece top.

I spent a couple of hours on the badge. It was really the only nod to the series. Not authentic I know, but it will do.


I chose this particular pair of pants because when they were deconstructed I had a full size discrete zippered pocket to work with. The waist band was cannibalized as well. The red fleece became the liner and with an internal drawstring, the bag is complete.

It IS for Christmas, but I'll let him know its ready,...............in case he wants to go to the gym.