Hop over to my new site and see the results from this workshop Part 1.
Who knew. I'm almost doing abstact art!
MARYHOPKINS.CA
Hop over to my new site and see the results from this workshop Part 1.
Who knew. I'm almost doing abstact art!
MARYHOPKINS.CA
If you haven't shifted over to my new website :
marykayhopkins.ca
I've added a link on the new blog page where you can enter you email address and you'll receive the post automatically.
Hope to hear from some of you soon.

Things came together today and I'm finally moving on a new work.
'Quail in the Field'
Follow it in the Blog at my new website
marykayhopkins.ca.
We're midway thorough this hot/rainy/cold month of July. The flowers and the veggies seem to like it. Just a reminder this month is the last month I'll be posting here. I've transitioned to my new Website.
marykayhopkins.ca.
Hope to hear from you, there.
Spent a lovely afternoon with my Step daughter, her husband and our LIVELY grandson. We did find a few moments together in the corner where Arwynn answered most of my questions about working with the new website.
I will be blogging there but will place a notice here each time over the summer. I then expect to discontinue my old blog. I hope you can all make the shift with me.
If you haven't already done so please check out my new site.
marykayhopkins.ca
✨
TA DAA
https://www.marykayhopkins.ca/
The blog is still active but there are a couple of steps you need to take to reach it.
After opening the Website and the blog link, it shows an April posting. At the bottom is a notice that says 'Older Postings'.. Click there......they are in fact current. So enjoy.
There are a few things to massage but it's looking wonderful.
Many, many thanks to my stepdaughter, Arwynn (who is working full time as a graphic artist, from home and living with a 3 1/2 yr old non stop charmer (as well as a wonderful husband) .....and who found time to do this for me.
See her fab work here. https://www.arwynn.com/
This blog is not collapsing but the email notifications are stopping.
I'm going to start using my Facebook page a little more exclusively for my Art information and when my Web Site is up I'll post that on Facebook as well. In the meantime if you haven't bookmarked my blog the address is
marykayhopkins123.blogspot .com
M
I just couldn't let it go. I spent hours on line looking for Faeries, Gnomes Goblins etc that weren't Disney or all T&A.
Finally found a couple and reduced the pictures down to about 2 inches.
The Faerie, high in the tree is FM stitched over a black line ink drawing on wash away stabilizer covered with black netting. So all that remains is the stitching on the netting. This was anchored using a dark mono filament that served to give some depth in the form of a slight shadow.
The second at the bottom on the forest and hiding in the furled tree roots is a Goblin or Hob. Everything but his eyes blends in. He was needle felted but left really fuzzy. He's had a dose of hair spray and after it dries I'll trim some detail into his face. ie. ears.
Here's my inspiration and their doubles.


The Faerie was easier than the Goblin.
Here was my inspiration.
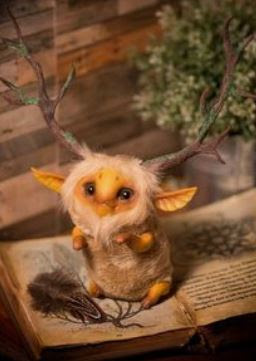
And here is my version embedded in the tree. (Ears need a little more definition.)


After I anchored the leaves with netting and tiny meandering, the trees were stitched firmly in place with all their folds and crevasses. The path is lightly stitched and the grasses and mosses are held with a few lines of stitching,
I'm calling this done.....but I'm itching to add some forest folk..........😉
A rainy day was enough to push me to finish ornamenting the trees with moss.
I had been feeling the right hand side was not right, in terms of perspective...too many trees and too close together. I was going to remove some but all I ended up doing was lifting the last one, the brown one and moving it out, increasing the size of it's neighbour, just enough.
Now that this portion is complete? ( I can always add more) it was time for the what I think is the final cropping (photoshopped not cut). I'm comfortable with these proportions.
Next comes adding batting and backing. Some stitching on the trees will properly anchor them and begin to define contours before I add branches and leaves.

Today I finished the moss on the base of the most distant trees. Then I jumped forward.
Now that I'm working in the foreground the final width of this piece becomes more important. I'm now realizing the last few trees are too narrow and perhaps I can remove a few and increase the width of the remainders.


Working on the closer and larger trees is much easier that those in the rear but they have been neglected. So I made up a couple of sheets of fusible fibres using unwound and destructured commercial yarns as well as fresh rovings.
(Gardening keeps cuttings my work time......It could be worse!)


Due to a change in the workings of BLOGGER.COM, as of the end of this month (June), they are no longer going to provide email notifications.
In response, I'm in the process of birthing my own website, co hosted with my Stepdaughter, Arwynn.
I will be able to list my new videos directly but I'm unfamiliar with the blog capabilities of the new web site. So I will be maintaining this site for as long as.....
Stay posted as I get dragged into the new Today. (Oh bother!)
I was going to start stitching the trees in place but then I remembered I needed to be able to lift the edges and slip the mosey/lichen and grass in behind
I had started with the grass in the distance but now as I reached some of the more prominent trees, placing the moss in and around the flutes of the bases required pain staking tweezer and mini iron work.
I made up several patches of fused mixed rovings. Each different colour or blend was fit, cut and lightly touched with the mini iron to melt the glue and anchor. I did over lay some more colours this way but I found it's hazardous to try to apply glue backed bits of wool over another glued bit of wool. The iron wanted to lift everything. It seemed I had one pass or try only. It was better to mix the colours as a patch and work from there.
Very slow 3 hours, but really rewarding.


I'm still playing with the cropping of this piece. Thank heavens for photoshop.
I added a full tree trunk on the right side and then at the last minute I decided to 'try' another tree on the left. Until this is all settled I don't want to start the foliage, grass, mosses and lichens.
The changes may be subtle to the viewer as you can compared todays results with yesterday. And yes it takes almost a day to add, furrow and anchor another tree.

The left side of this piece is cropped to what I had imagined would be the edge, but I'm rethinking that now as I move forward and outwards.
Though this is unmistakably a vertical piece I'm not happy with just how narrow it is. The trees that are placed now have a lot more character and will require a lot of tweaking to get them where I'm happy.

Working with the pleater is giving me the effect I like. I received some suggestions about using some other products that crinkle with heat. What I like about the pleater is that I can control the linear placement of the bark as it moves down the tree. I can shift it and create hollows that I don't think I would get with other methods..
So I've taken the left side out as far as I'm going to go.
The path is off centre so there are a number of large trees to go into place on the right.
Finding the best fabric (when I really can't go out and browse) is the challenge.


